Have you ever wanted to go off-grid without alerting everyone who has access to your location? Whether you’re planning a surprise visit, need some personal space, or just value your privacy, there are times when you might want to stop sharing your location without causing those awkward “Why did you stop sharing your location with me?” texts.
The good news is that there are several ways to stop sharing your location on iMessage without the other person being explicitly notified. In this guide, I’ll walk you through all your options—from quick temporary fixes to permanent solutions.
Does iMessage Notify When You Stop Sharing Location?
Before we dive into the methods, let’s address the big question: Does iMessage actually notify people when you stop sharing your location?
Here’s the truth: When you use the standard method to stop sharing your location through the Find My app, the other person doesn’t receive a push notification saying “John has stopped sharing their location with you.” However, if they open their Find My app or check your location in iMessage, they’ll see one of these indicators:
- “Location Not Available”
- “No Location Found”
- “Location sharing has been stopped”
So while they’re not actively notified, they’ll definitely notice the next time they check. That’s why the methods I’m about to share are important if you want to remain under the radar.
7 Proven Ways to Stop Sharing Location Without Notifying iMessage
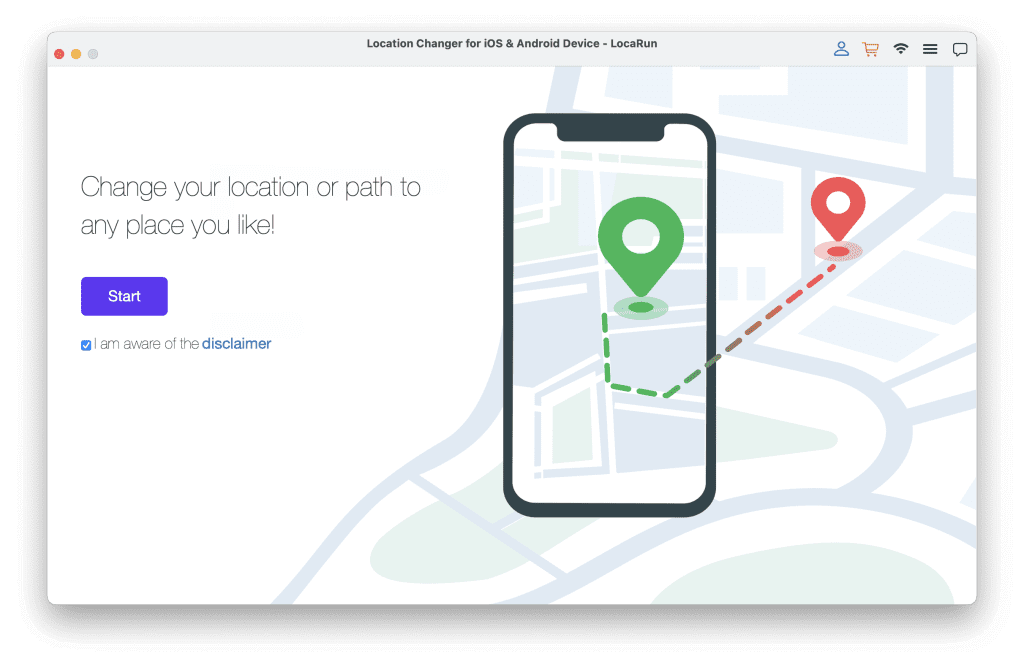
Method 1: Use LocaRun to Change Your iPhone’s Location
If you want the most reliable way to stop location sharing without anyone knowing, using a specialized location changing app like LocaRun is your best bet. Instead of stopping location sharing (which can raise suspicions), you can simply change where your iPhone appears to be.

How to use LocaRun to control your iMessage location sharing
Step 1: Download and Install LocaRun
Download the appropriate version for your computer (Windows or macOS). After installation, launch the application and click “Start” to begin.
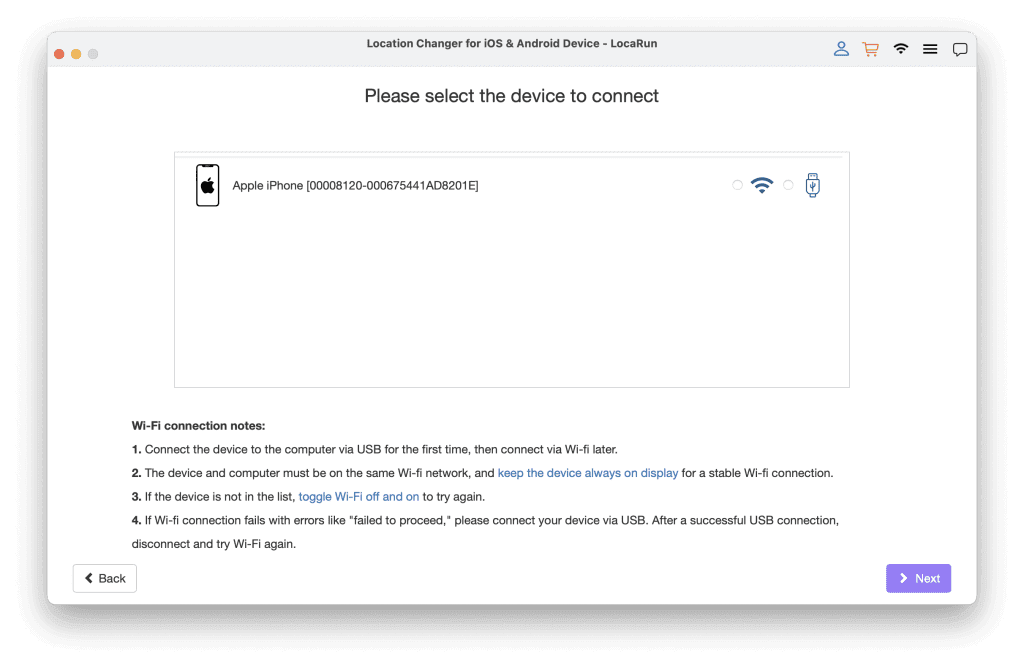
Step 2: Connect Your iPhone
Connect your iPhone to your computer using one of two methods:
- USB Connection: Use your Lightning or USB-C cable to connect directly. Follow the on-screen prompts to trust the connection on your iPhone.
- Wi-Fi Connection: For subsequent uses, connect wirelessly when both your iPhone and computer are on the same Wi-Fi network. (Note: First-time setup requires USB connection)
Step 3: Enter Teleport Mode
Once your iPhone is successfully connected, the map interface will load automatically. This is where you’ll select the location you want to appear at on iMessage and Find My.
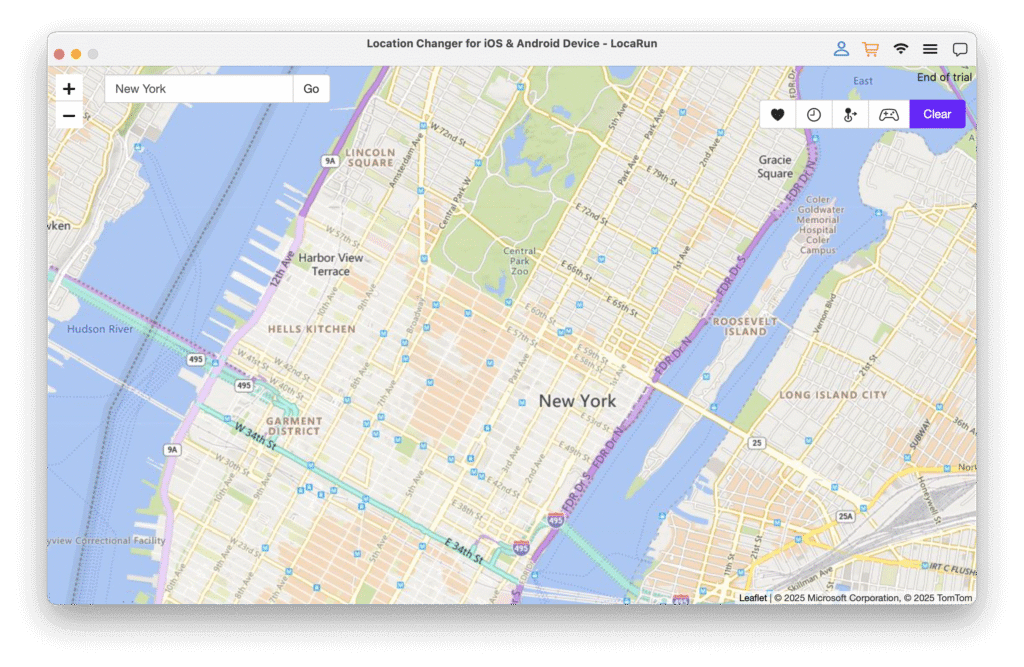
Step 4: Select Your Virtual Location
Navigate the map by scrolling to zoom in/out and clicking to select your desired location. Alternatively:
- Type a specific address or location name in the search box
- Enter precise coordinates if you have them
- Use the “Favorites” feature to quickly select previously saved locations
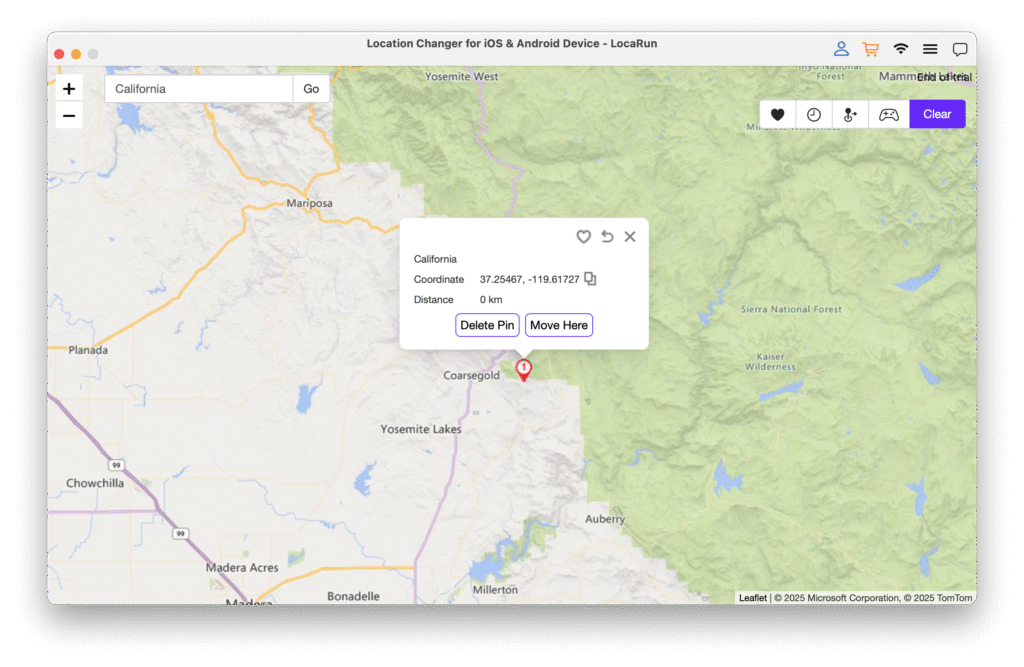
Step 5: Change Your Location
After selecting your destination, click “Move Here” to instantly teleport your iPhone’s GPS location to this spot. LocaRun will handle all the technical aspects to make this location change appear natural.
Step 6: Verify in iMessage and Find My
Open the Messages app or Find My app on your iPhone while keeping LocaRun running. Your shared location will now show the virtual location you selected. Anyone tracking your location will see you at this new place without receiving any notification about a change.
Method 2: Turn on Airplane Mode
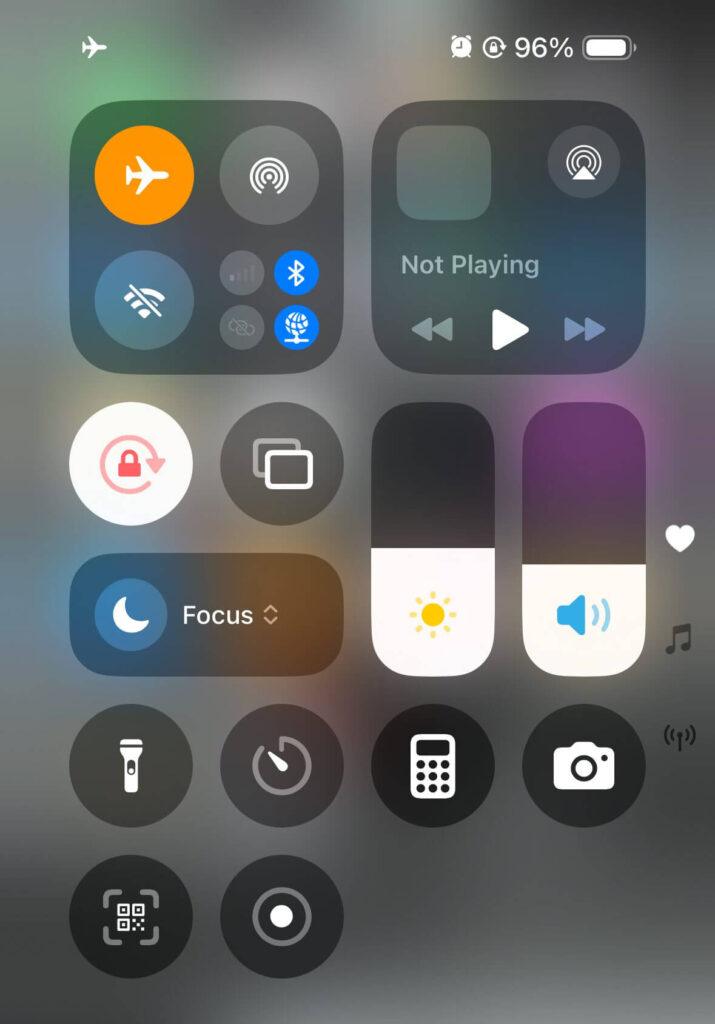
If you need a quick, temporary solution, Airplane Mode is your friend. When your phone is in Airplane Mode, it can’t transmit your location data, so you’ll appear as “Location Not Available” to your contacts.
How to use Airplane Mode to hide your location:
- Swipe down from the top-right corner of your iPhone screen (or up from the bottom on older models)
- Tap the airplane icon to enable Airplane Mode
- Your location will stop updating while this mode is active
The drawback? You’ll lose all connectivity—no calls, texts, or internet access. Also, the moment you turn Airplane Mode off, your location will update, and the person may notice that you’ve reappeared in a different location than they expected.
This method works best for brief periods when you don’t need to use your phone and just want to pause location sharing temporarily.
Method 3: Disable Location Services for Find My App
Another effective approach is to disable Location Services specifically for the Find My app. This prevents your iPhone from sharing your location without turning off all location-based services.
Follow these steps:
- Open the Settings app on your iPhone
- Scroll down and tap “Privacy & Security”
- Tap “Location Services”
- Scroll down and tap “Find My”
- Select “Never” to disable location access
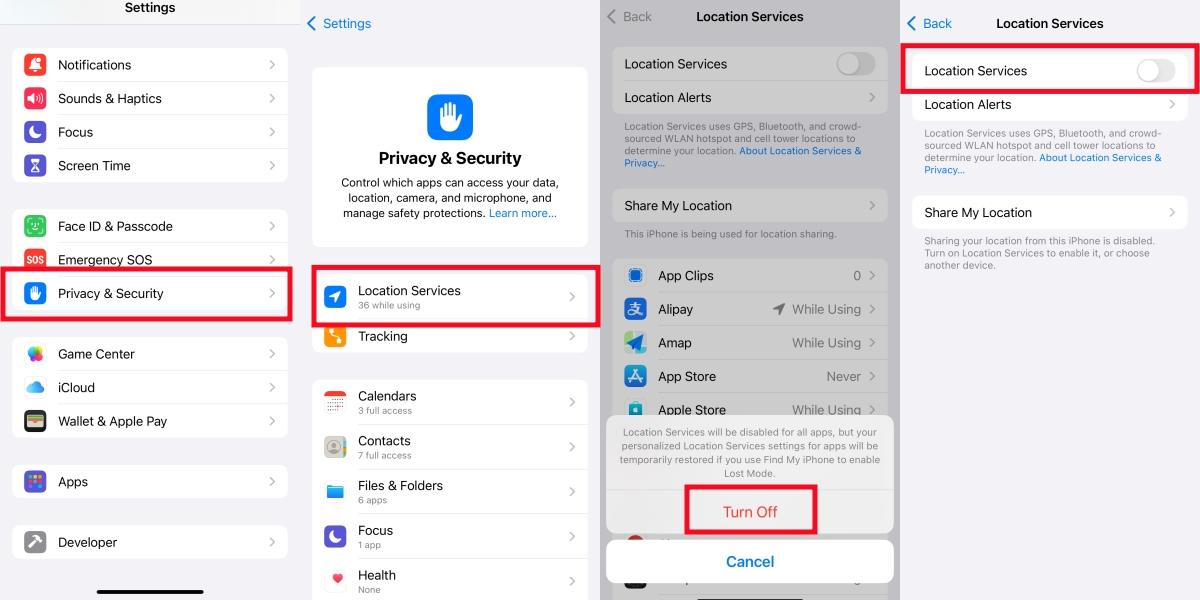
With this method, your status will show as “Location Not Available” to others, but you’ll still be able to use other location-based services like Maps, Weather, etc.
The potential downside is that you also won’t be able to use the Find My app to locate your own devices if they go missing. For many people, this is an acceptable trade-off for increased privacy.
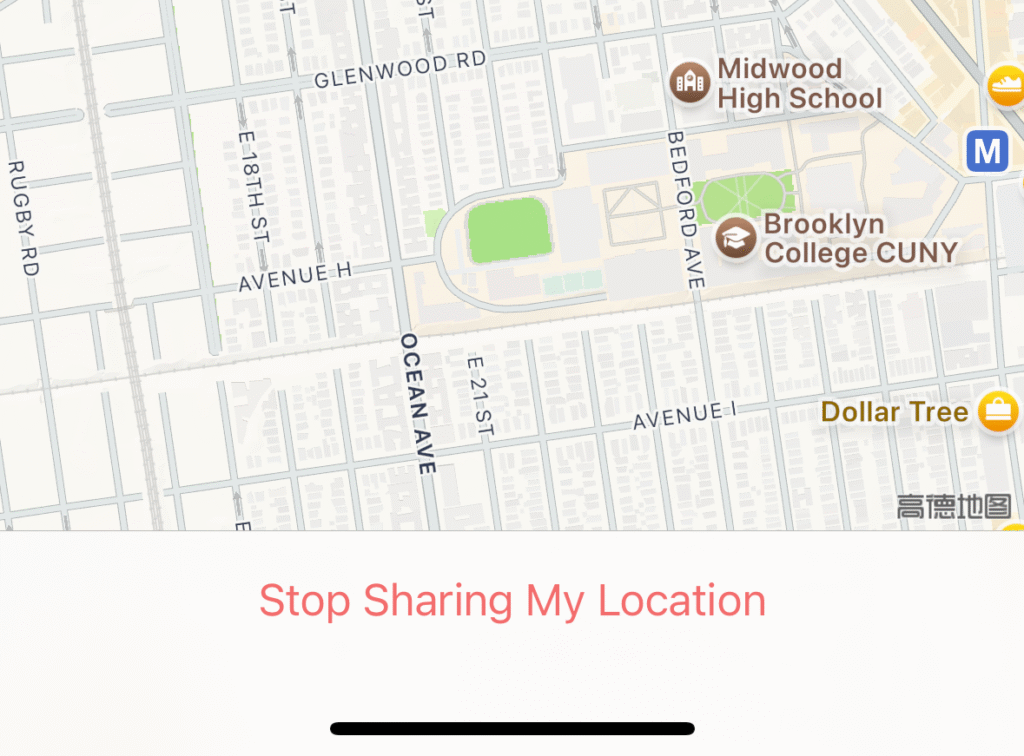
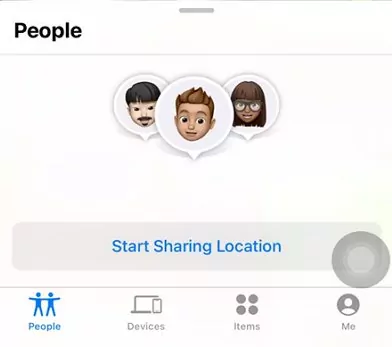
Method 4: Stop Sharing Location with Specific Contacts
If you only want to stop sharing your location with certain people, you can do that selectively:
- Open the Find My app on your iPhone
- Tap the “People” tab at the bottom
- Select the person you want to stop sharing with
- Scroll down and tap “Stop Sharing My Location”
While they won’t receive a notification about this change, they will see “X stopped sharing location with you” the next time they check your location. This method is more direct and noticeable, so it’s not ideal if you’re trying to be completely discreet.
However, it’s perfect when you’re simply looking to reset boundaries with specific people and don’t mind if they eventually notice.
Method 5: Turn Off “Share My Location” Feature Completely
If you want to stop sharing your location with everyone at once:
- Open Settings on your iPhone
- Tap on your name at the top to access your Apple ID settings
- Tap “Find My”
- Tap “Share My Location”
- Toggle off “Share My Location”
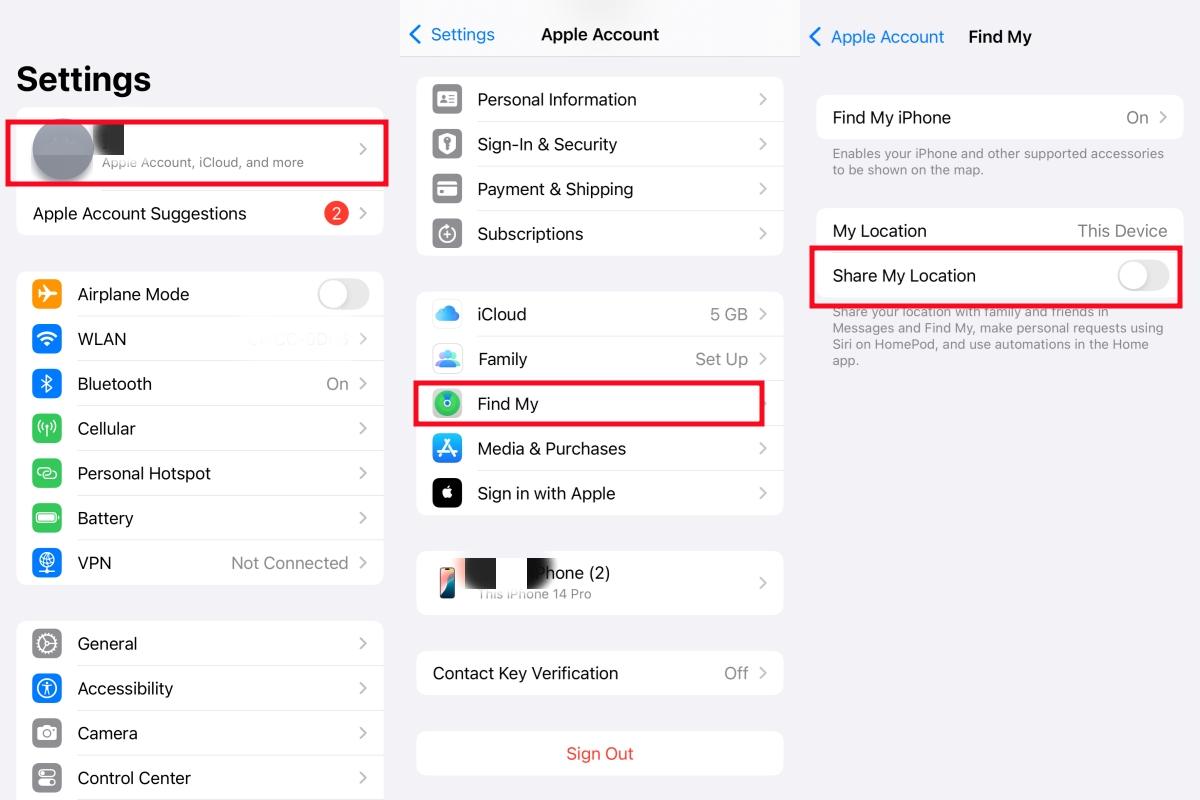
This will stop location sharing with everyone you’ve previously shared with. Again, they won’t get an immediate notification, but they’ll see that your location is unavailable when they check.
This method is great when you want a clean break from location sharing across all your contacts without having to disable them one by one.
Method 6: Use Another Apple Device as Your Location Source
This clever technique involves setting another Apple device (like an iPad or an old iPhone) as your location source and then leaving that device in a specific location:
- Go to Settings > [Your Name] > Find My > Share My Location
- Under “From,” select another device you own
- Leave that device where you want others to think you are
Now your contacts will see you at the location of your other device, while you’re free to move around with your iPhone. This method is particularly useful if you regularly spend time in certain locations (like home or work) and want people to think you’re there while you’re actually elsewhere.
Just remember to keep that device charged and connected to Wi-Fi for this to work!
Method 7: Sign Out of iCloud (Last Resort)
If all else fails, you can sign out of iCloud entirely:
- Go to Settings > [Your Name]
- Scroll down and tap “Sign Out”
- Enter your Apple ID password and tap “Turn Off”
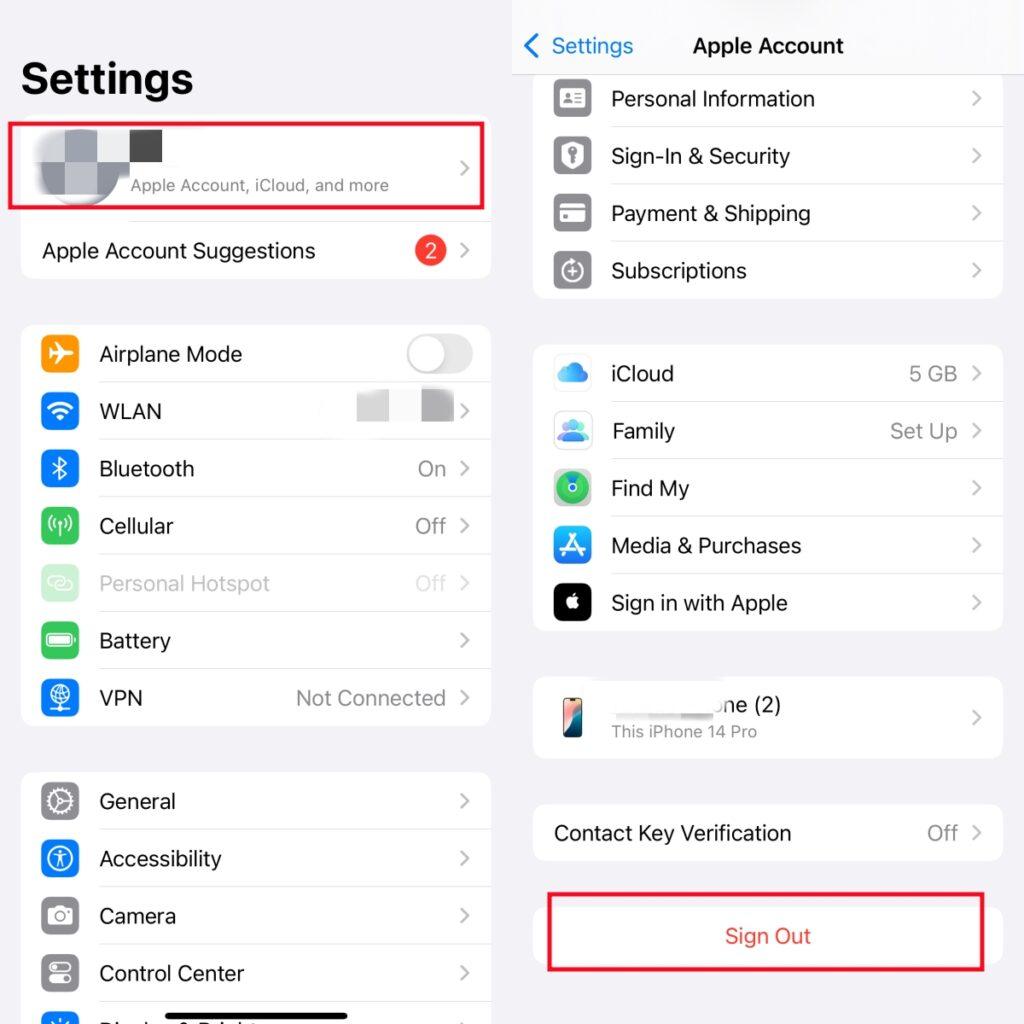
This is a nuclear option that will disable all iCloud services on your device, including location sharing. However, it will also disconnect your device from all other Apple services tied to your Apple ID, like iCloud Drive, Photos, Notes, etc.
I recommend this method only as a last resort when privacy is absolutely critical and temporarily outweighs the convenience of your Apple services.
Comparison of Methods
| Method | Effectiveness | Ease of Use | Risk of Detection | Side Effects |
|---|---|---|---|---|
| LocaRun Location Changer | ★★★★★ | ★★★★☆ | Very Low | None |
| Airplane Mode | ★★★☆☆ | ★★★★★ | Medium | No connectivity |
| Disable Location Services | ★★★★☆ | ★★★★☆ | Medium | Can’t locate your devices |
| Stop Sharing with Specific Contacts | ★★☆☆☆ | ★★★★★ | High | Clear indication of change |
| Turn Off Share My Location | ★★★☆☆ | ★★★★★ | Medium | Stops sharing with everyone |
| Use Another Device | ★★★★☆ | ★★★☆☆ | Low | Requires second device |
| Sign Out of iCloud | ★★★★★ | ★★☆☆☆ | Medium-High | Loses all iCloud features |
What Happens After You Stop Sharing Location?
When you stop sharing your location using any of these methods, the other person’s experience will vary slightly:
- With LocaRun, they’ll continue to see your (fake) location without interruption
- With other methods, they’ll typically see “No Location Found” or “Location Not Available”
- If they’re actively looking at your location when you make the change, they might notice the status change immediately
If someone asks why your location isn’t available, you can always blame it on technical issues: “I’ve been having problems with my Find My app” or “My location services have been glitchy lately.”
If you later decide to resume location sharing, you’ll typically need to re-enable it through the Find My app and send a new invitation to share your location with that person.
FAQs
Conclusion
We all deserve privacy sometimes, and controlling who knows your whereabouts is part of that. Whether you choose LocaRun for a seamless experience that keeps your movements private without raising suspicions, or opt for one of the built-in iPhone methods like Airplane Mode for quick fixes, you now have several effective options at your disposal.
For temporary privacy needs, the simpler methods work fine. For ongoing location privacy without awkward questions, LocaRun offers the most natural solution by showing a plausible location rather than an obvious “Location Not Available” message.
Remember that while these methods are perfect for surprises or personal time, open communication about location sharing remains important in your relationships.
Hi, I’m Julia, a digital privacy specialist at Locarun. I write about our GPS location changer tool and how it helps protect your online privacy. My passion lies in making cybersecurity and geolocation technology accessible to everyone. I focus on practical solutions for data protection and accessing region-specific content. Let me guide you through improving your digital privacy with straightforward, effective approaches.