Part 1. Connect
Step 1. Launch LocaRun
- Download and install LocaRun on your Mac.
- Once installed, open the LocaRun application on your Mac.
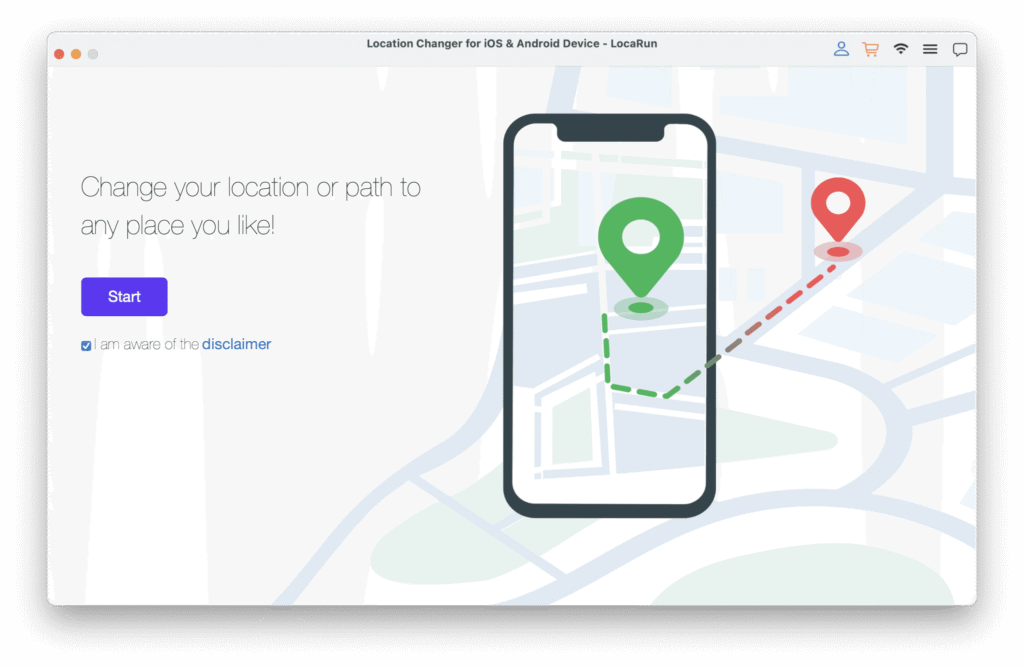
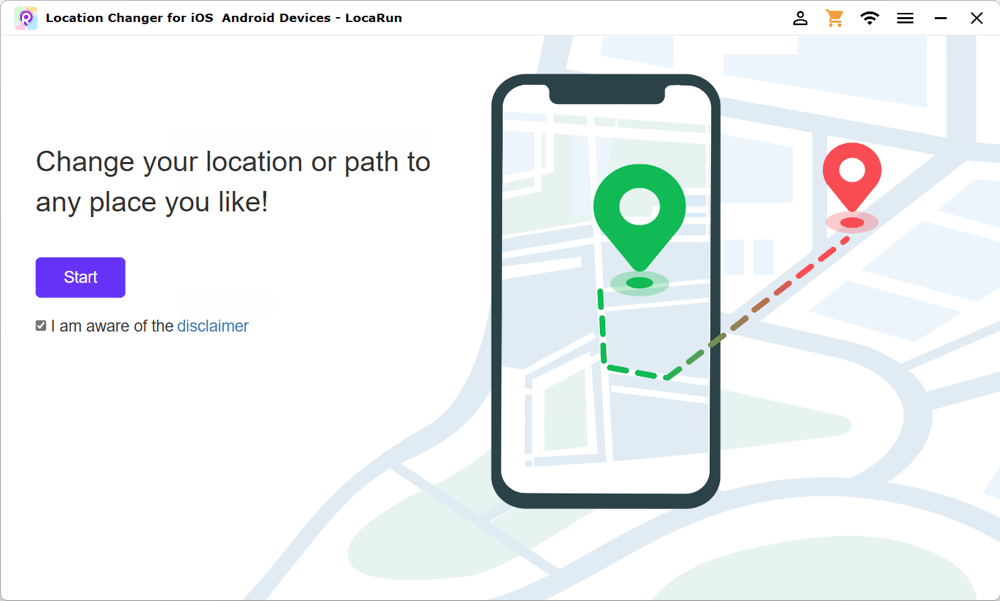
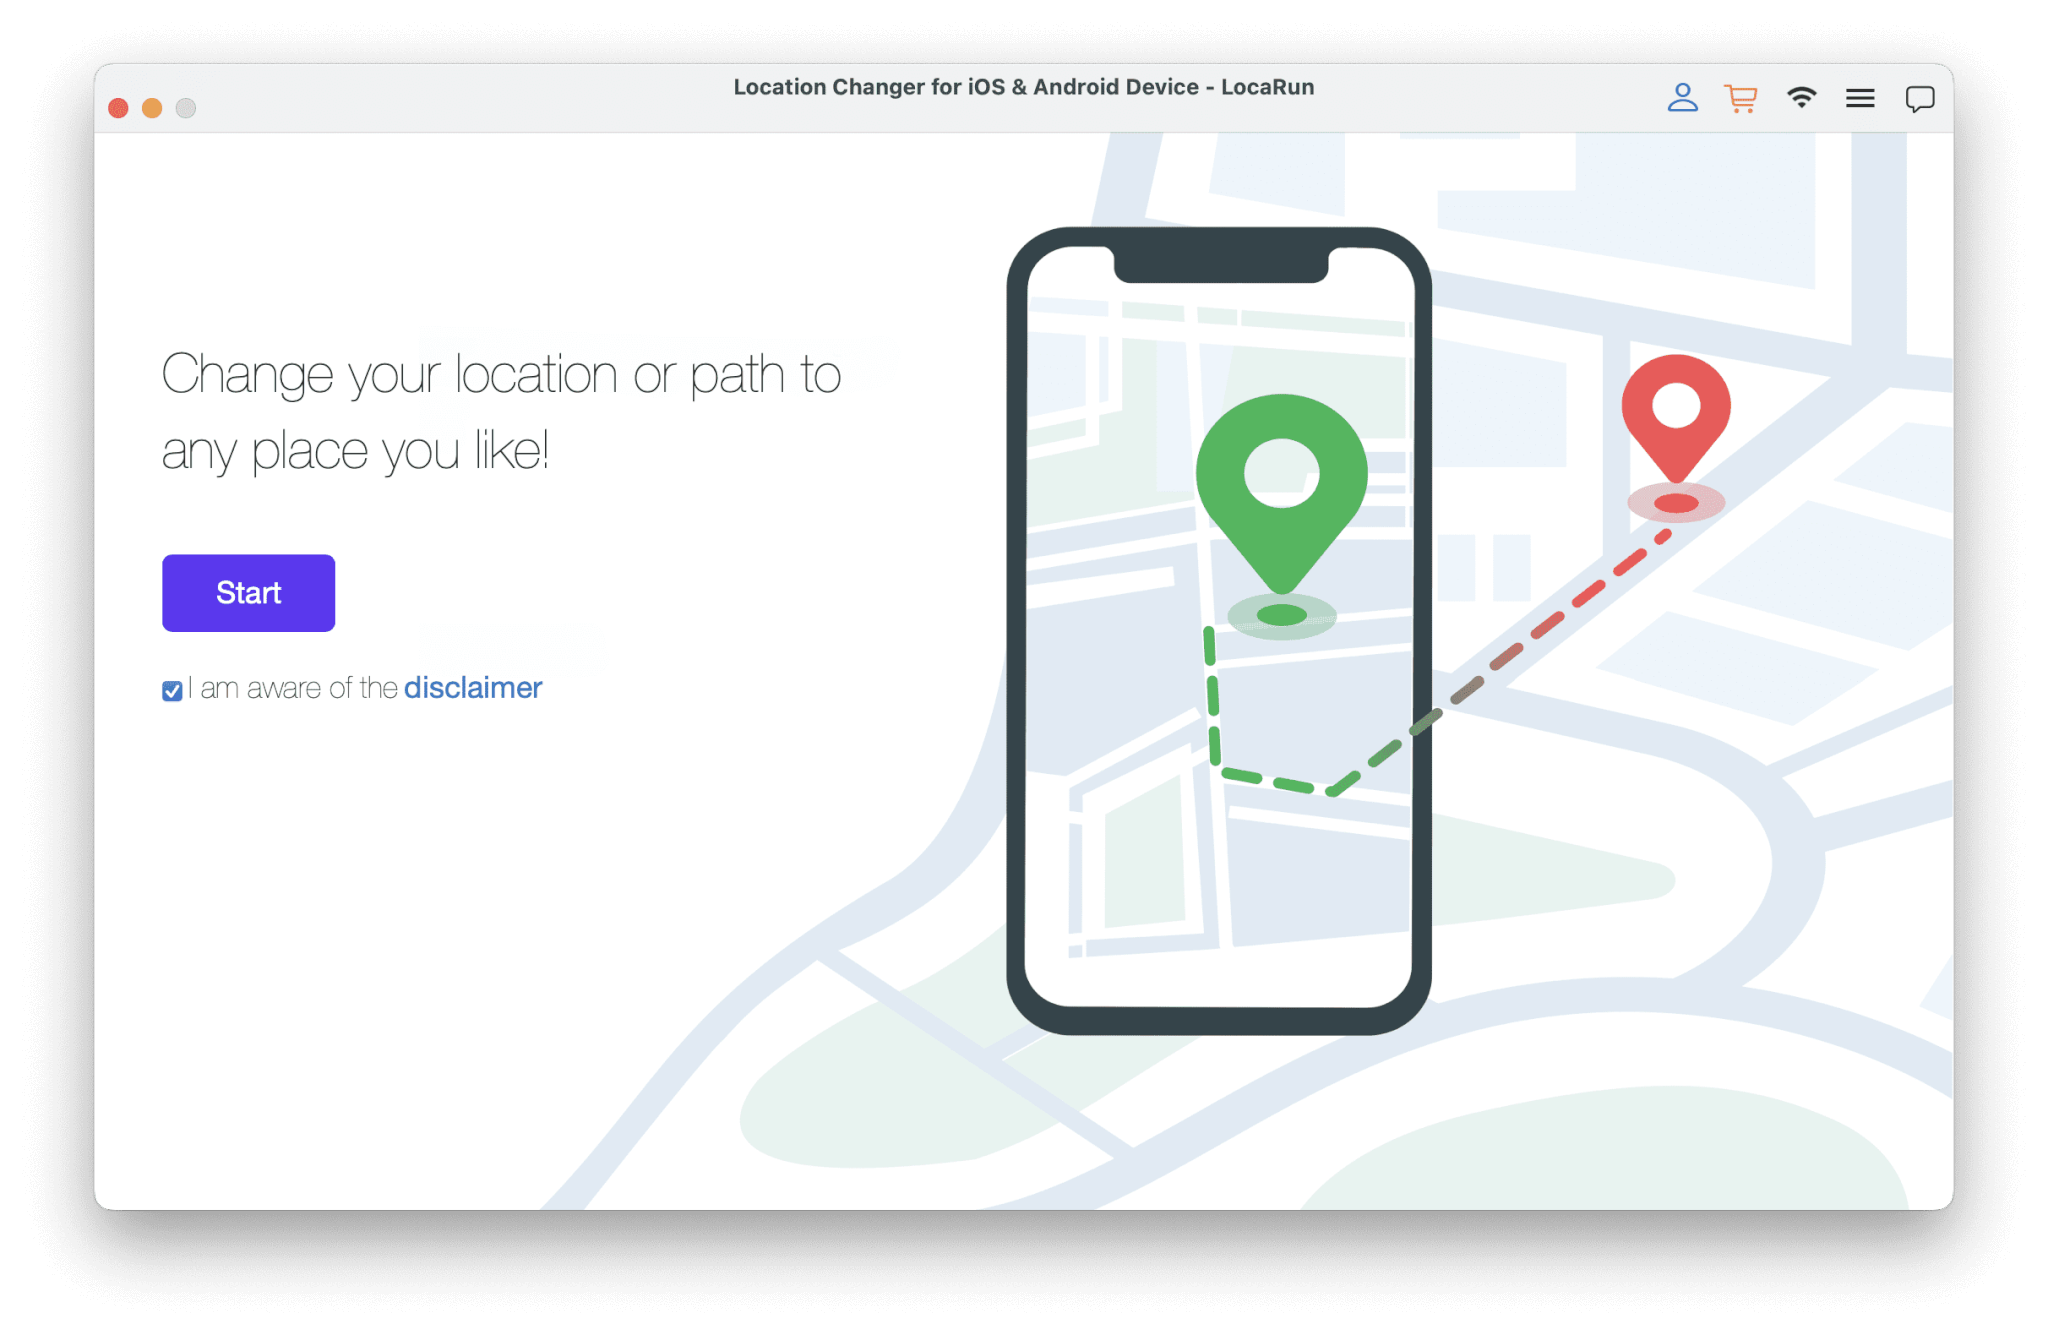
- Choose “Start” to begin.
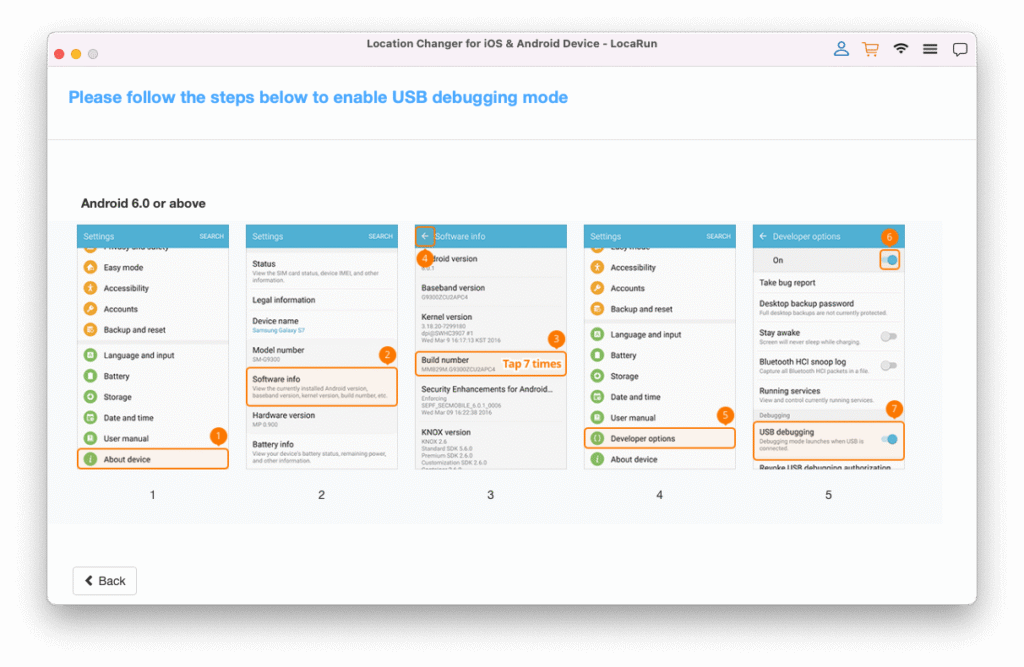
Step 2. Enable Developer Options on Android Device
To successfully connect your Android phone to the computer, you need to enable USB debugging first.
- Open your Android device’s Settings.
- Scroll down to About Device and tap it. Then choose Software info.
- Find the Build Number and tap it 7 times to enable Developer Options.
- Go back to Settings, and you’ll now see Developer Options in the menu.
- In Developer Options, locate and enable USB Debugging mode.
- If you don’t see this option, make sure Developer Options are fully enabled by checking that the toggle is active.
Note: USB Debugging is essential for the communication between your Android device and the Mac through LocaRun.
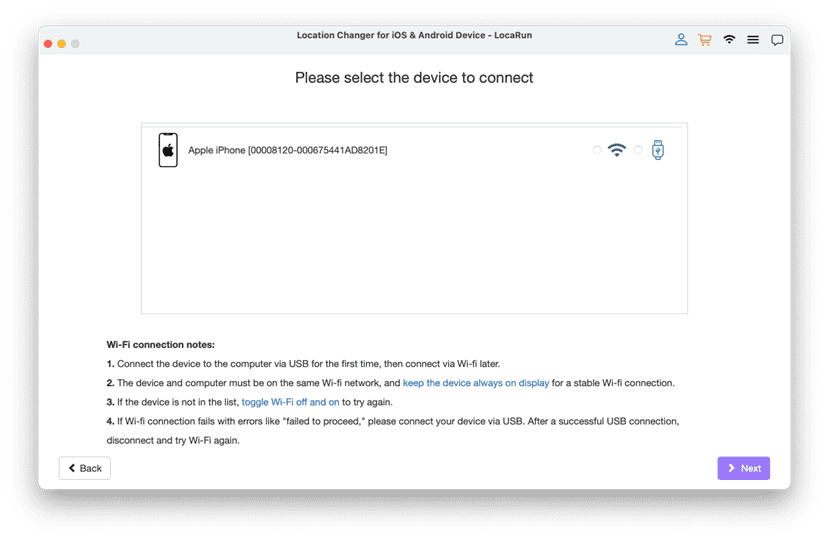
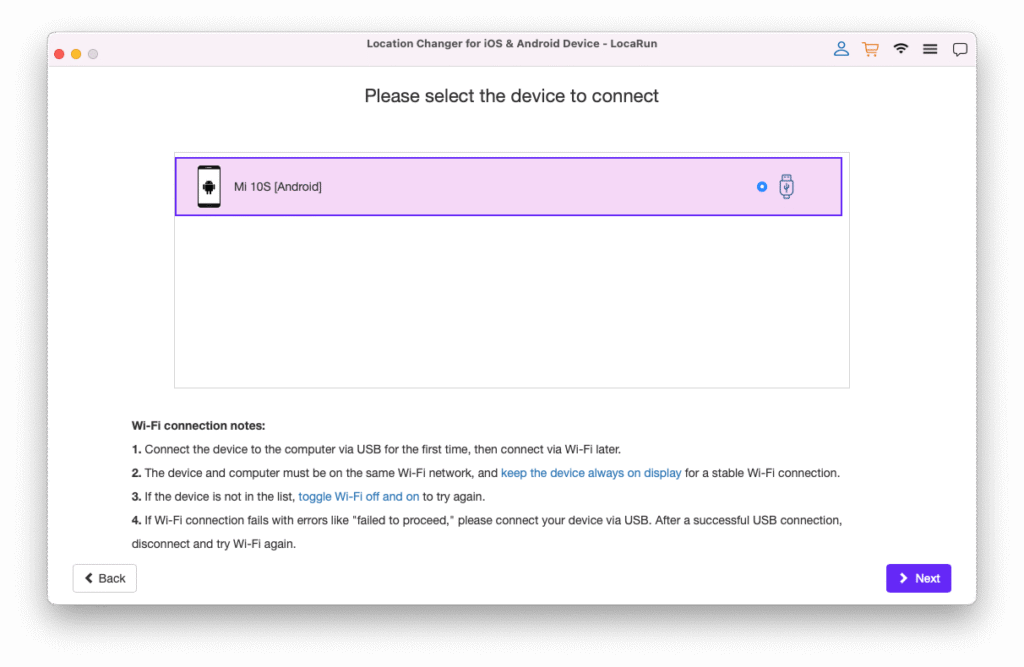
Step 3. Connect Your Android Device
You have the option to connect your Android device via USB or Wi-Fi. Once the Android device is connected, select it from the list of available devices in the LocaRun application.
USB Connection:
- Connect your Android device to the computer via a USB cable.
- Enter your Mac’s password to authorize LocaRun to make the necessary changes.
Wi-Fi Connection:
- For first-time setup, you must initially connect your Android device via USB cable.
- For subsequent connections, you can connect directly via Wi-Fi as long as both the Mac and Android device are on the same Wi-Fi network.
- If your device doesn’t appear on the list, try toggling Wi-Fi off and on again to re-establish the connection.
Note: Ensure both your Android device and Mac are connected to the same Wi-Fi network for the Wi-Fi connection to work smoothly.
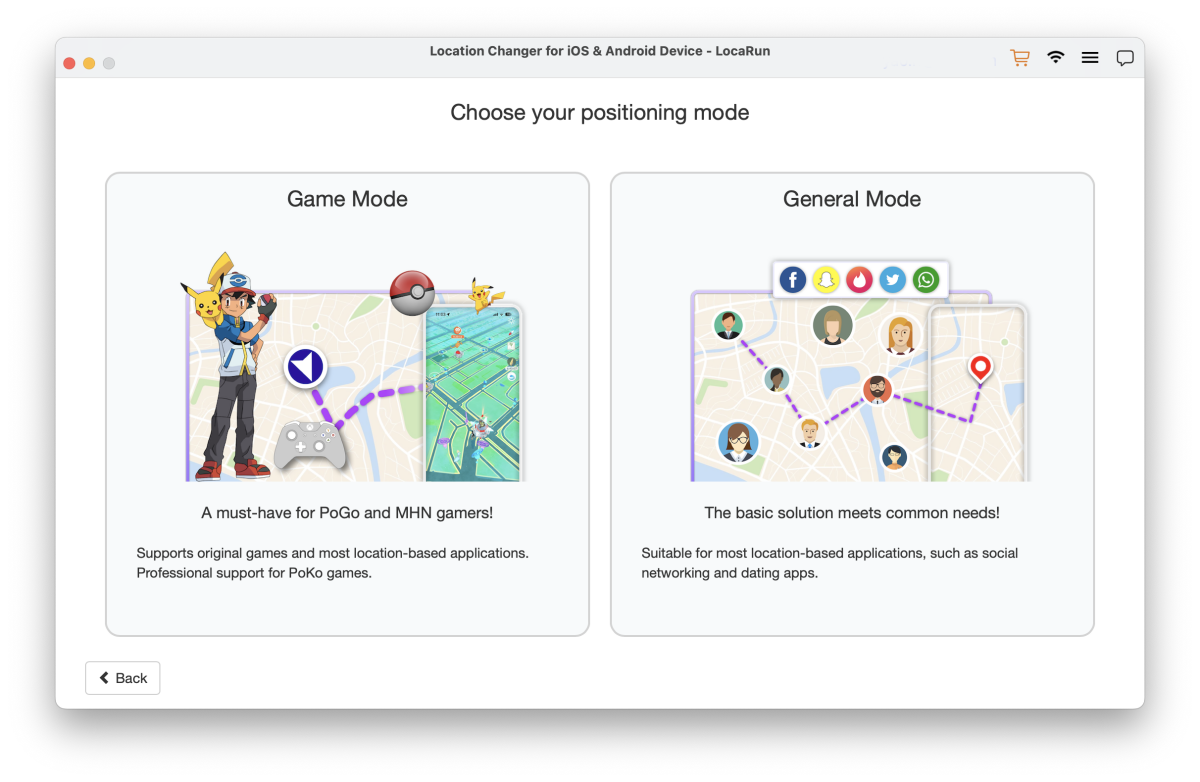
Step 4. Choose Positioning Mode
Now you should choose your positioning mode: Game Mode or General Mode.
Game Mode:
- Recommended: If you plan to use LocaRun to modify your location while playing games, such as Pokémon Go.
- Protection: The Cooldown Timer will be automatically enabled in this mode, safeguarding your account from being banned by the platform due to rapid location changes during gameplay.
General Mode:
- Sufficient: For your general, daily location modification needs if you do not have game account safety concerns.
Step 5. Install Required App
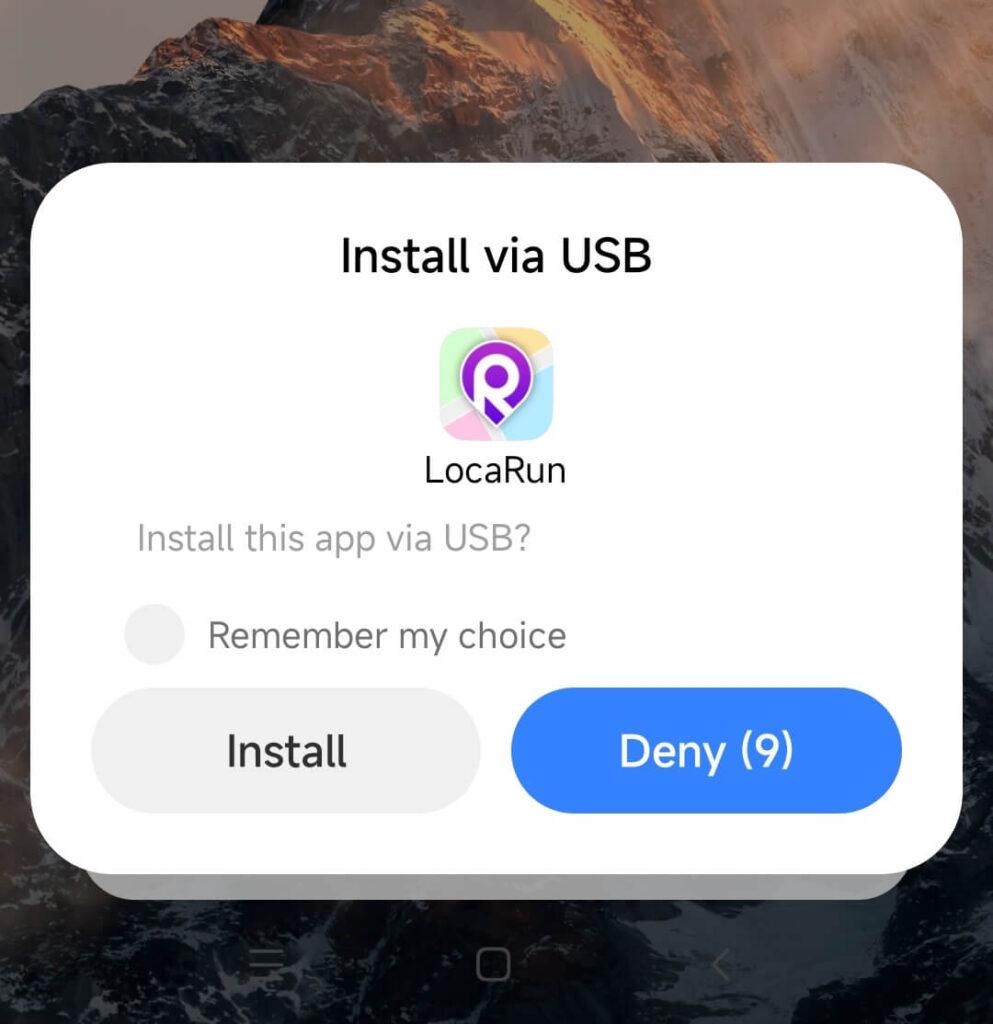
Now the system will automatically install any necessary drivers for your Android device.
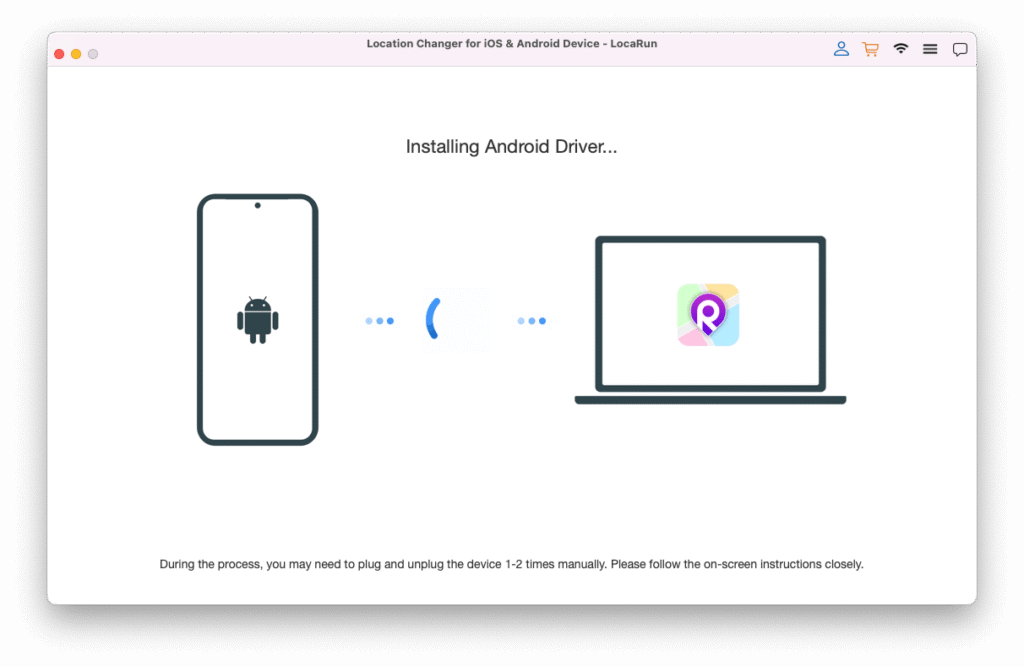
On your Android device, when prompted, select Install to install the necessary components.
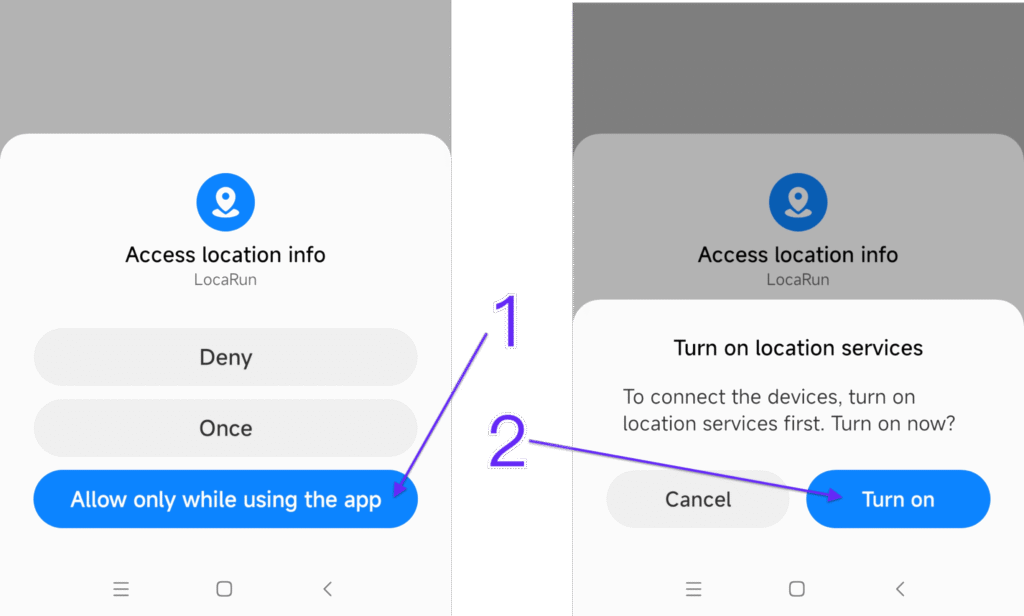
Step 6. Grant Necessary Permissions
- After installation, allow the necessary permissions on your Android device for LocaRun to function correctly.
- Confirm any prompts that may appear to grant necessary access for LocaRun to make changes to the device.
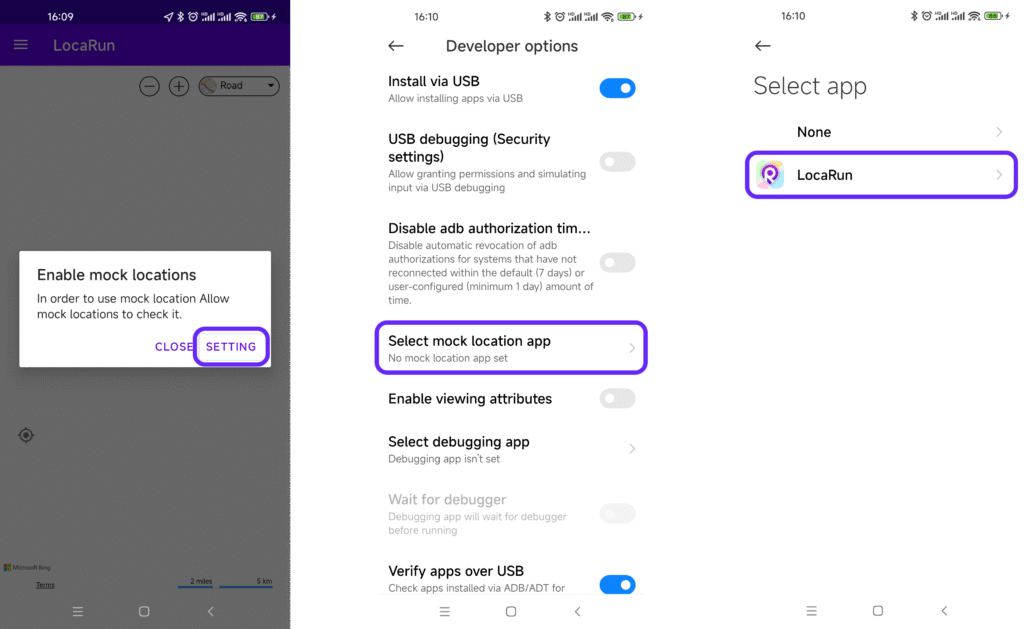
Step 7. Set Mock Location App
- In Developer options, find and select Select mock location app.
- Choose LocaRun from the list.
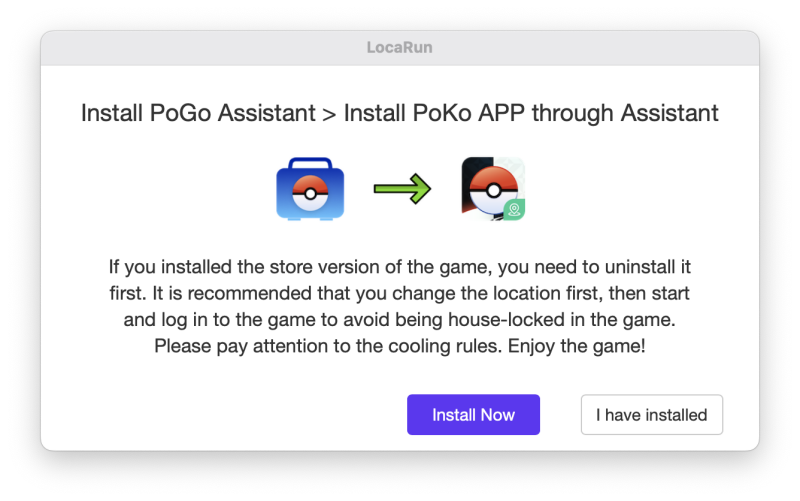
Notice: In the Game Mode, you need to install PoGo Assistant on your device according to the instructions.
Part 2. Change Your GPS Location to Anywhere (Android Devices)
LocaRun offers a suite of modes to help you simulate GPS movement on your Android device.
Teleport Mode
Instantly change your location from point A to point B.
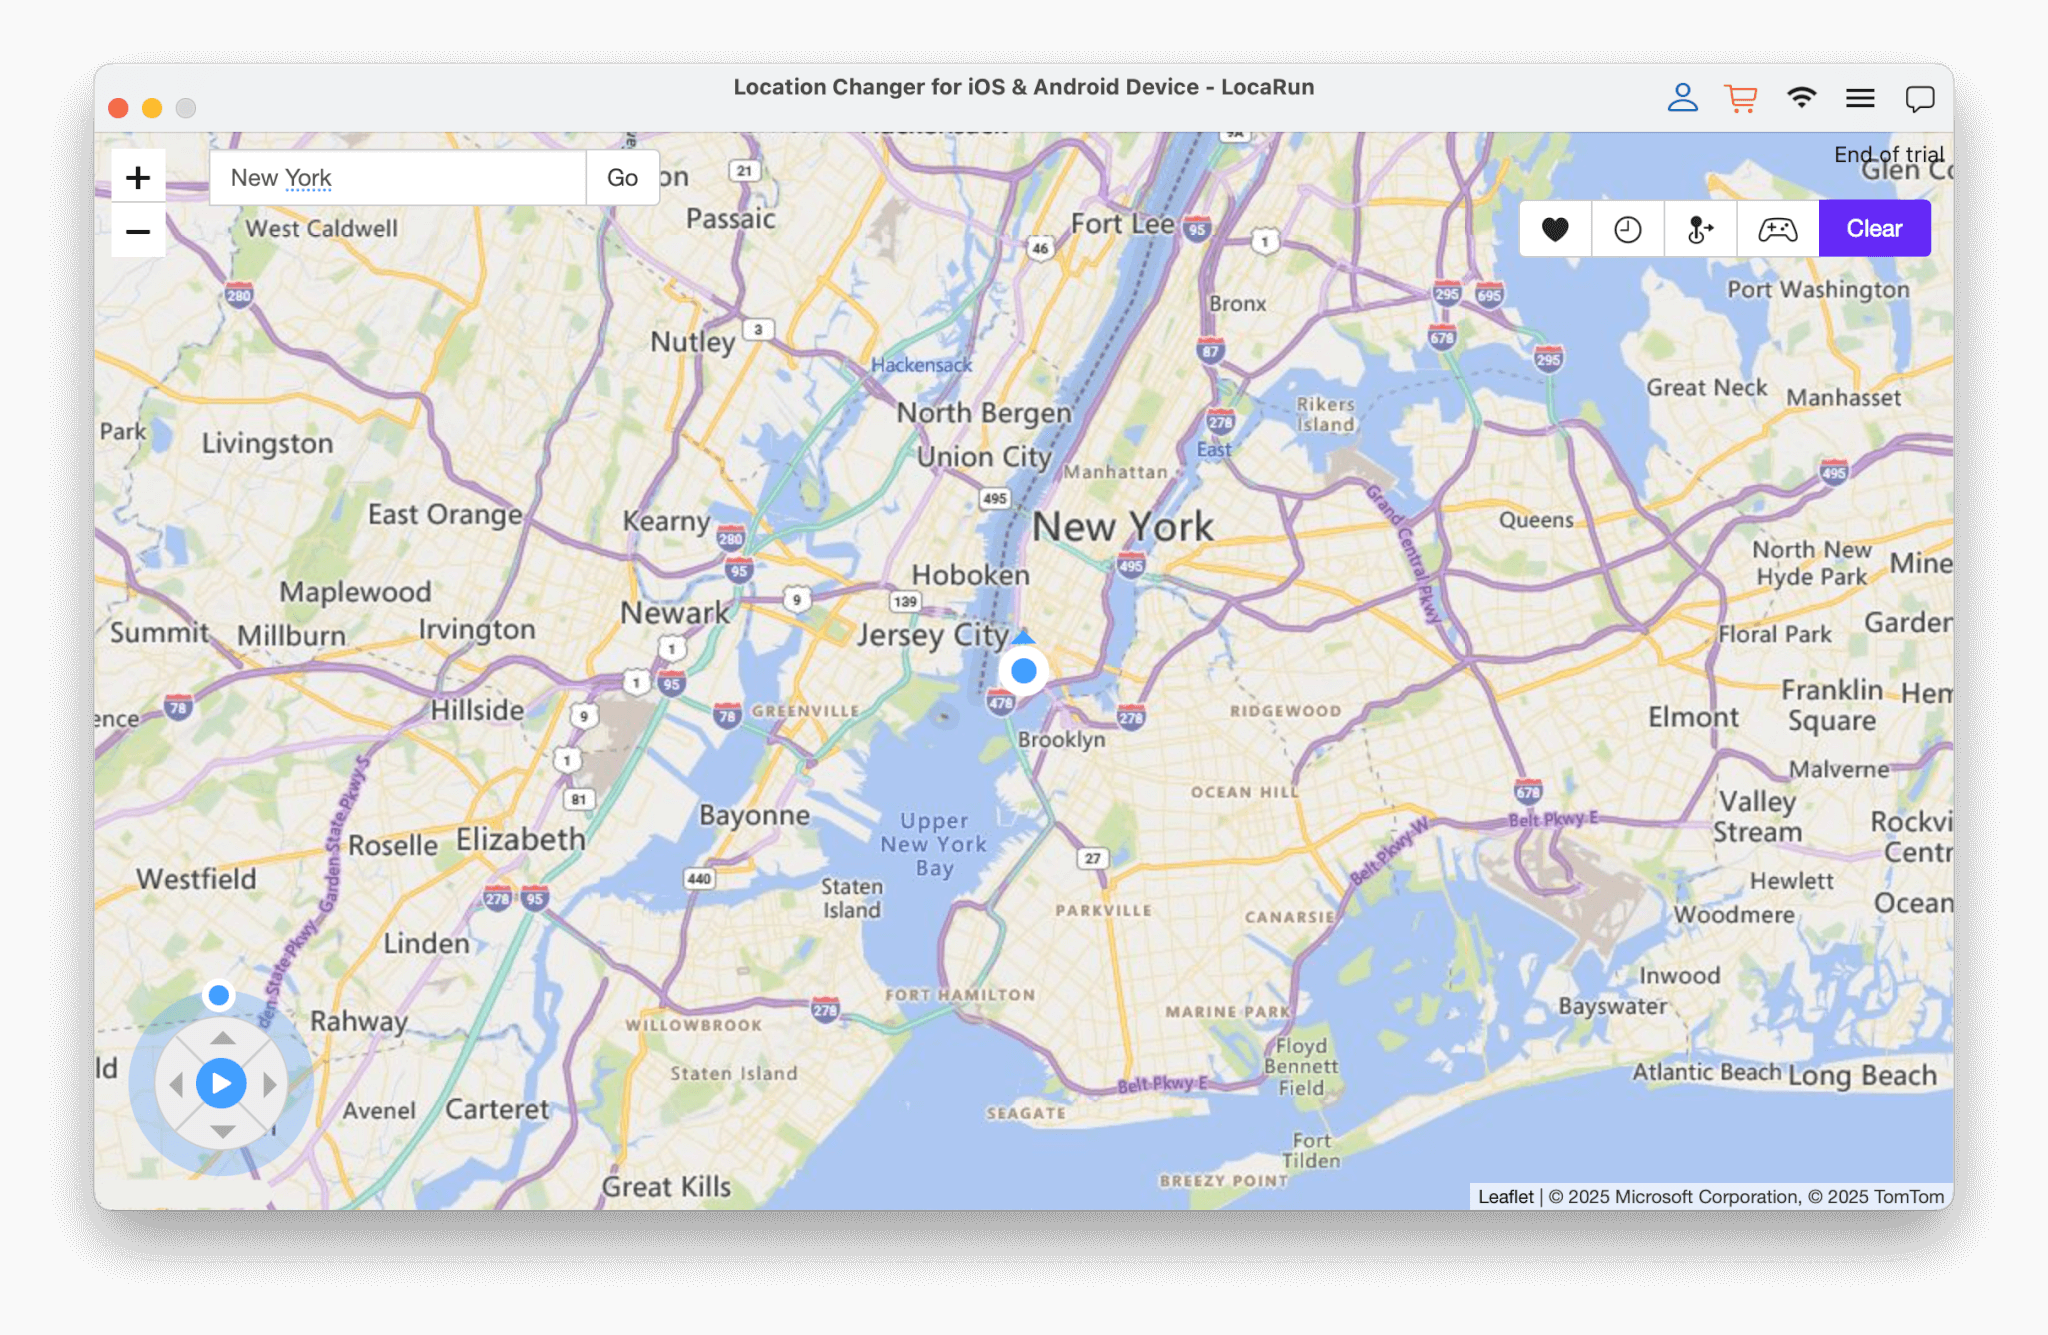
Step 1. Load the Map
Upon successful connection, the map will automatically load.
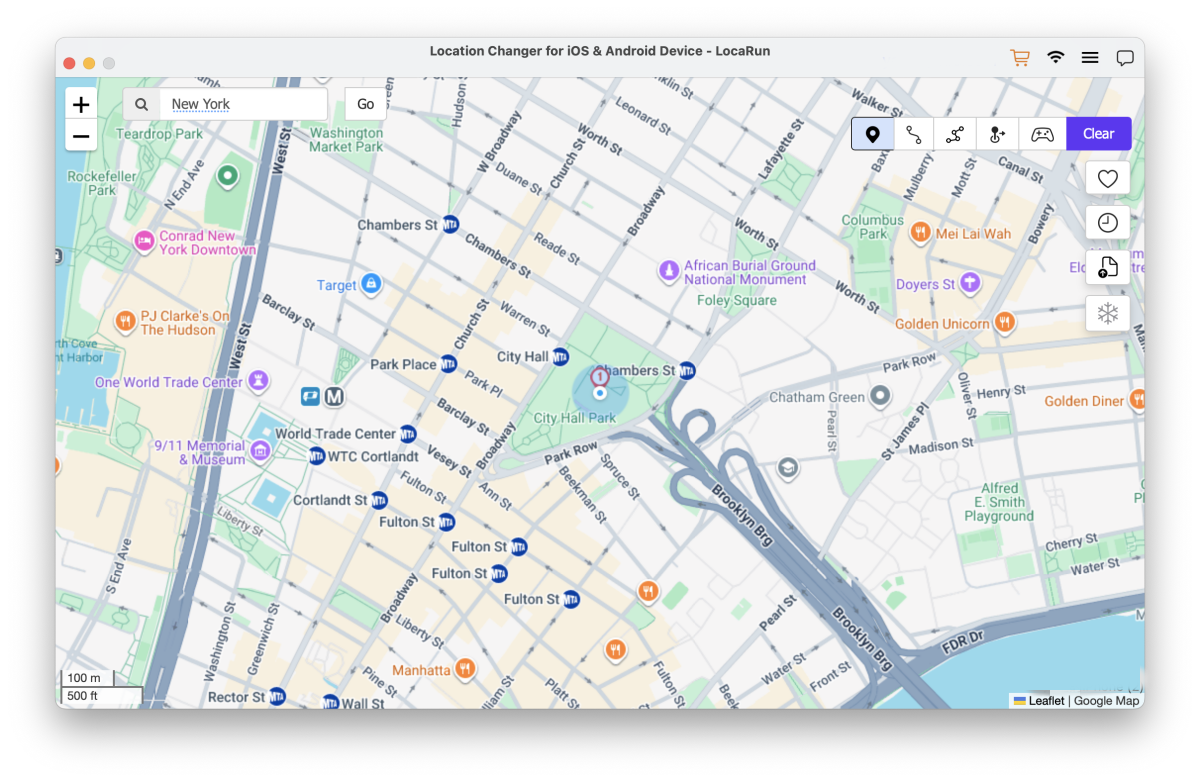
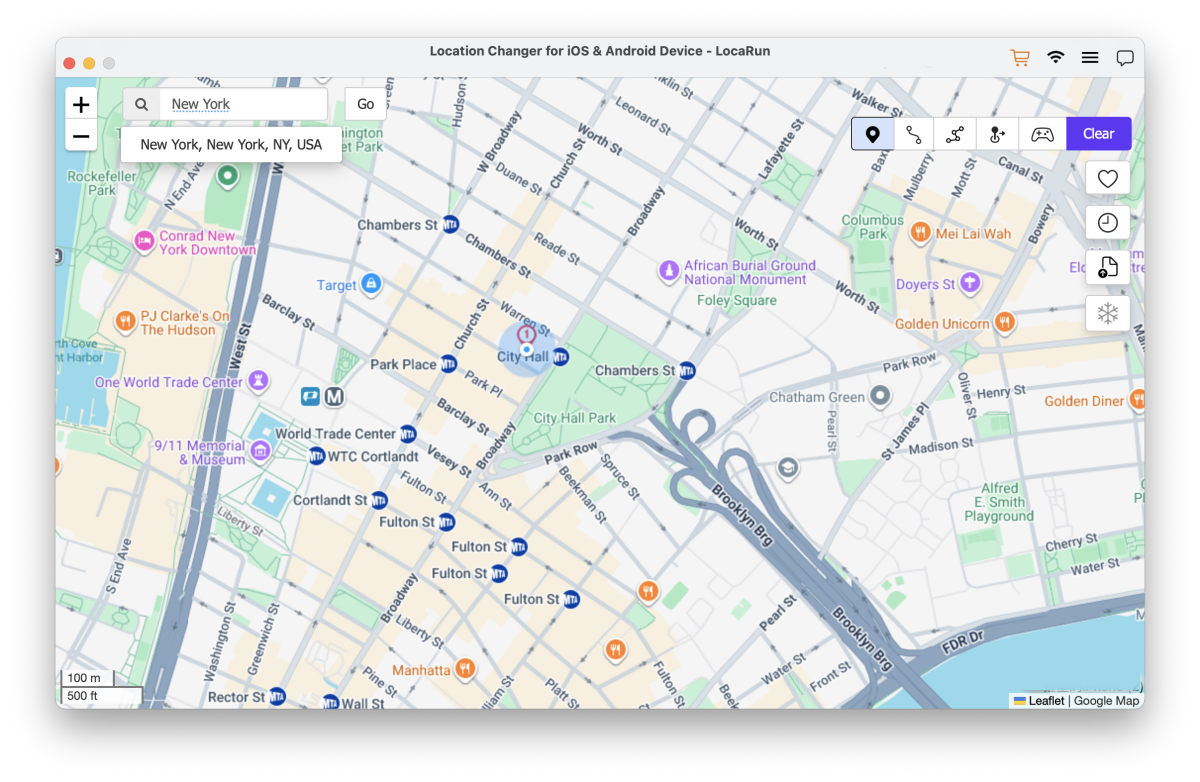
Step 2. Select a Destination
- Navigate the map using your mouse to zoom and pan.
- Click to select your desired destination or enter a location name or coordinates in the search box and click Go.
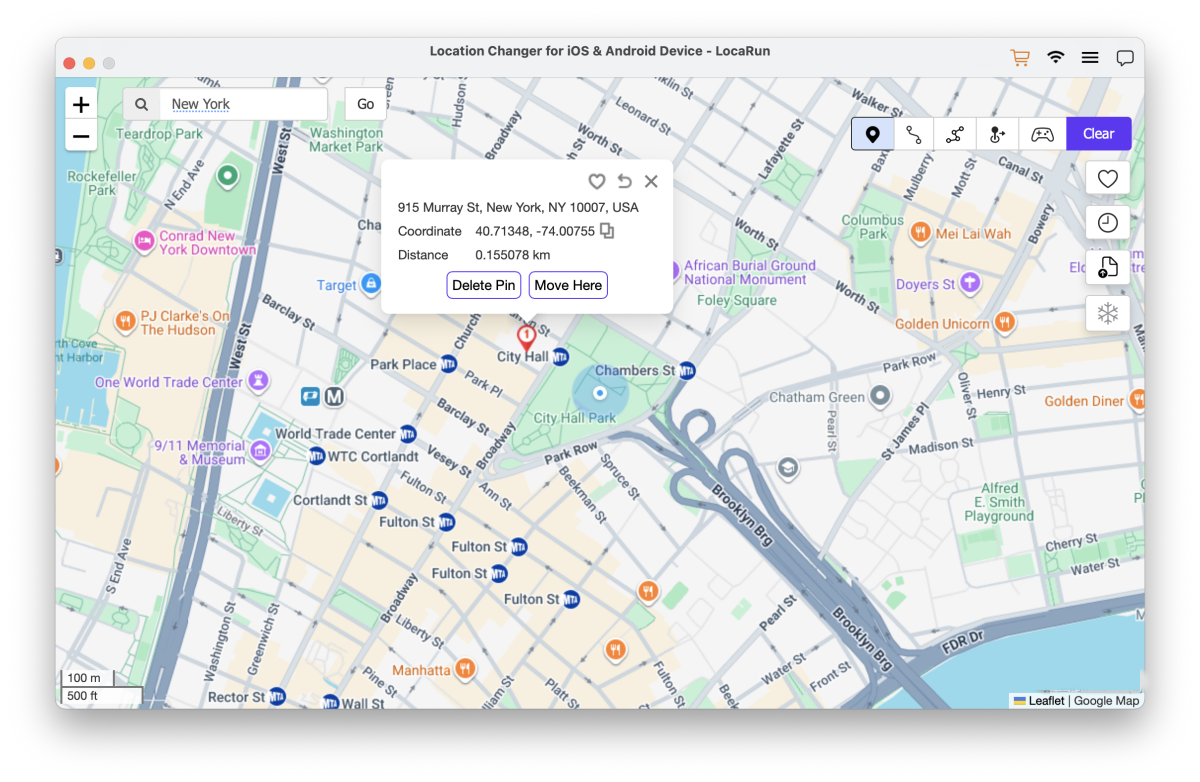
Step 3. Jump to a New Location
After selecting a destination, a pop-up displays the details, including the place name, coordinates, and distance. Simply click “Move Here” to instantly teleport. Verify your new spot by opening the Maps app on your device.
Two-Spot Mode
Simulate movement between two points with customizable speed and repetition.
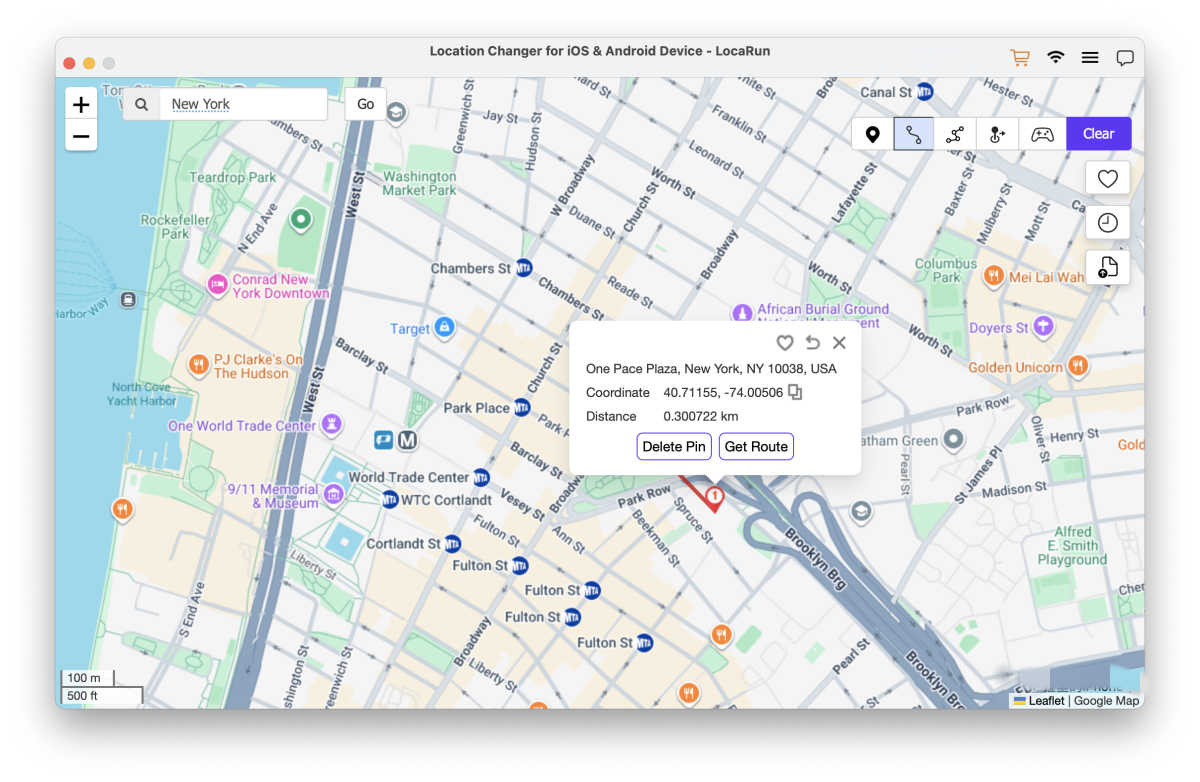
Step 1. Choose Start and End Points
- Select your starting location and destination by clicking on the map or entering addresses/coordinates in the search box.
- Click Get Route to create the path.
Step 2. Set Movement Parameters
- Customize your movement speed (up to 120 km/h).
- Set the number of times to repeat the route.
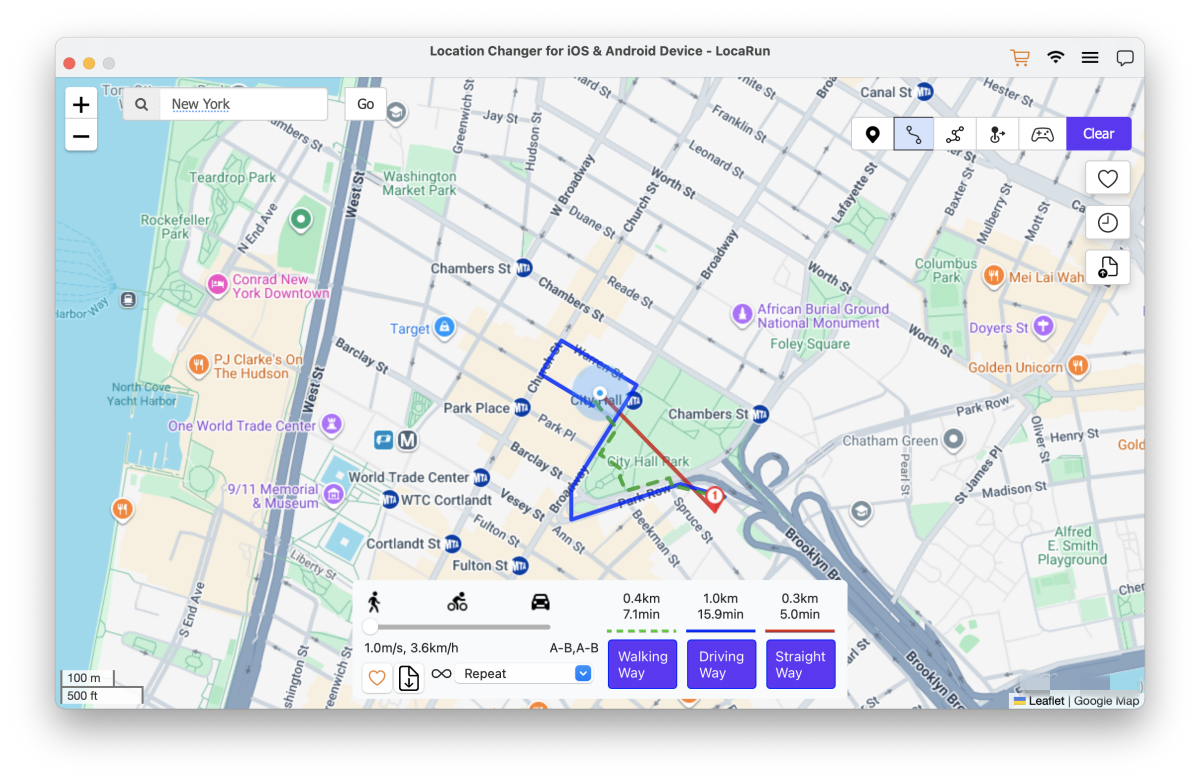
Step 3. Select Movement Method
- Choose between Walking Way, Driving Way, or Straight Way.
- Click March to begin the simulated journey.

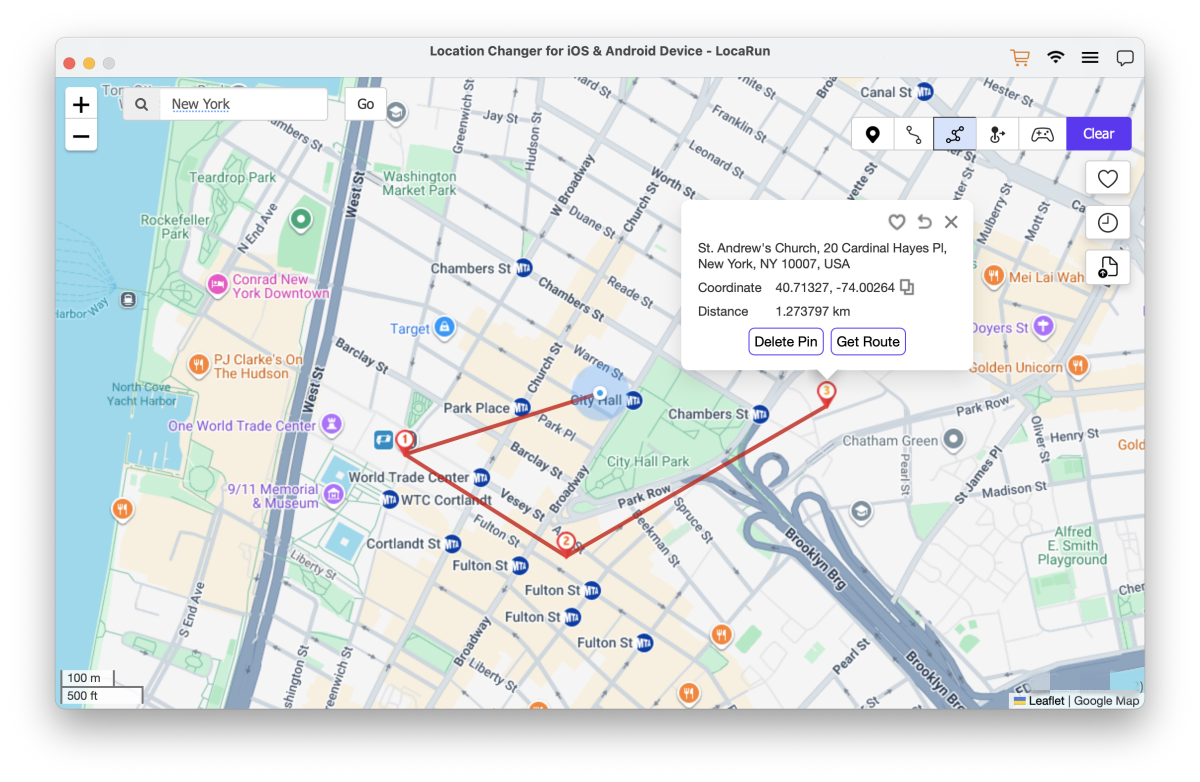
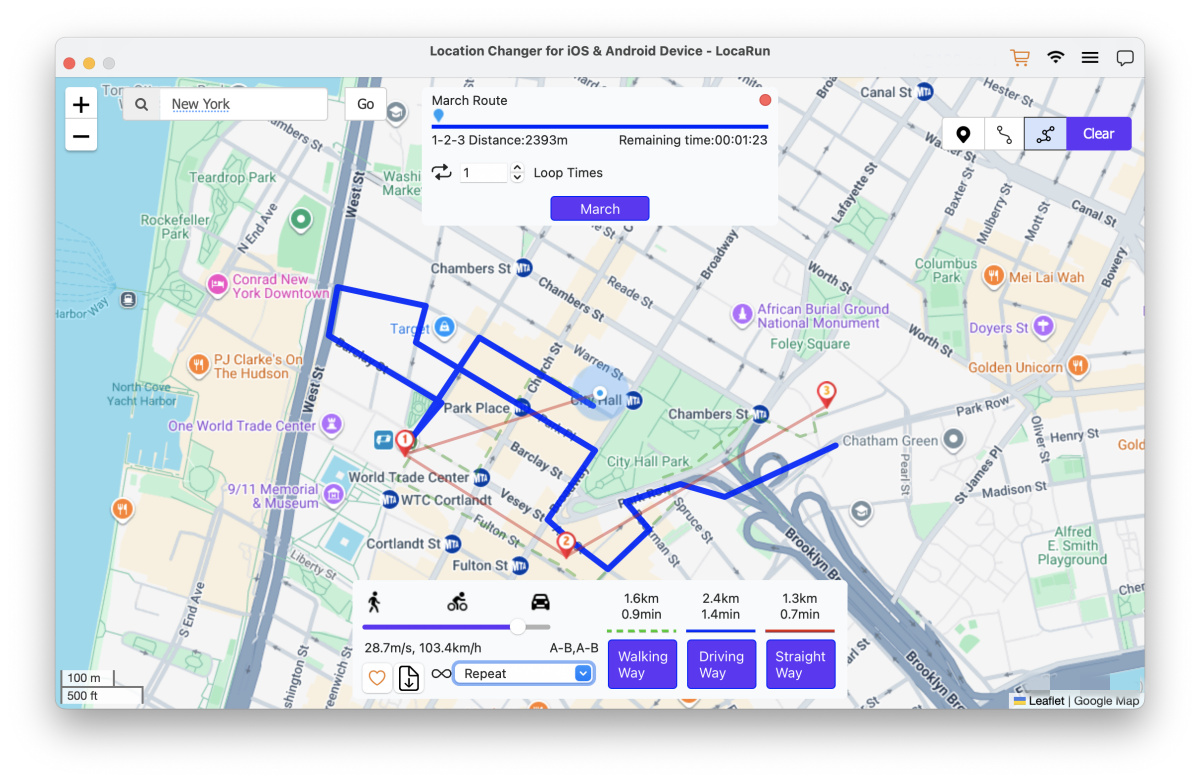
Multi-Spot Mode
Ideal for simulating movement through multiple locations.
Step 1. Select Multiple Locations
- Click on the map to mark multiple destinations in the desired sequence.
- Click Get Route to generate the path.
- To remove a location, select it and click Delete Pin.
Step 2. Customize Speed and Loop Mode
- Choose a loop mode: Repeat (return to the start after reaching the end) or Loop Around (continue in a circular pattern).
- Set your movement speed between 3.6 km/h and 120 km/h.
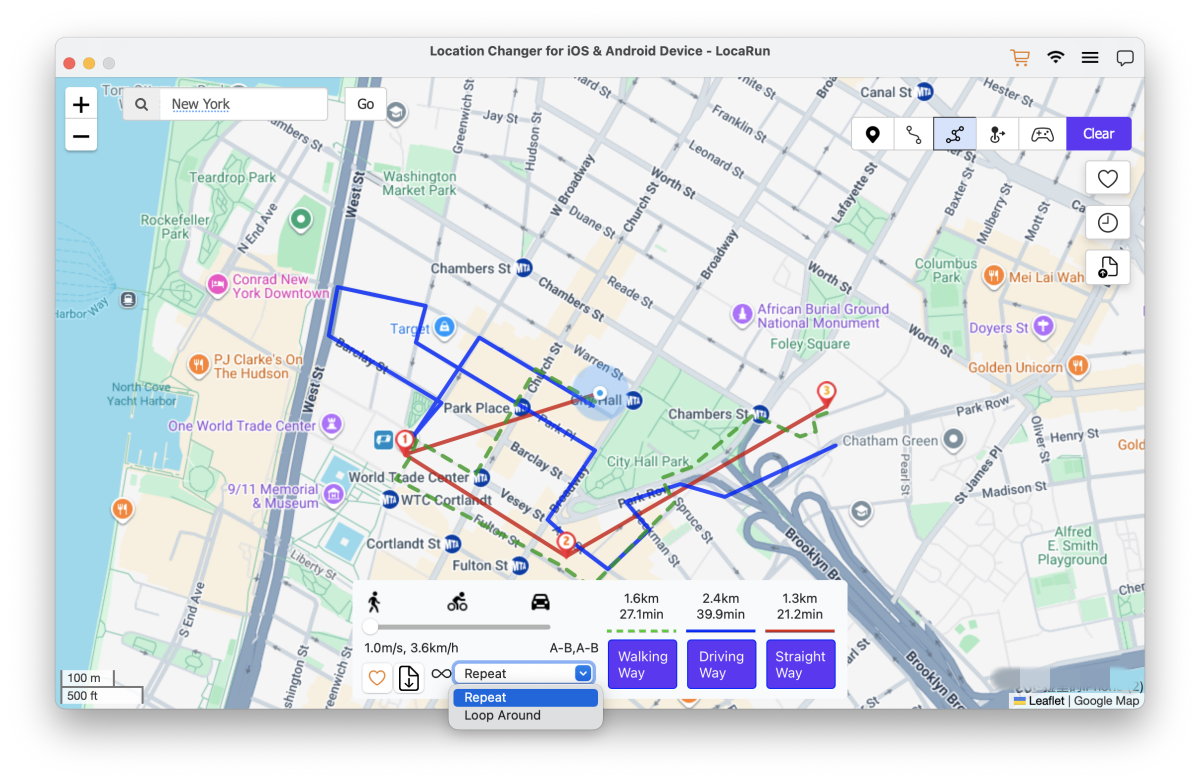
Step 3. Choose Movement Method
- Select Walking Way, Driving Way, or Straight Way.
- Click March to start the multi-spot journey.
Joystick Mode
Gain real-time control over your movement using your keyboard.
Step 1. Enter Joystick Mode
- Click the Joystick Mode icon located in the upper-right corner of the interface.
- The joystick control panel will appear at the bottom left of your screen.
- Click Start to activate it.
Step 2. Control Movement
- Use the directional buttons to move forward, backward, left, or right with 360-degree freedom. Or you can use keys Up, Down, Left, Right to control GPS spot movement.
- Adjust your speed using the up and down buttons.
This mode allows for precise, real-time control of your virtual location.
More Features
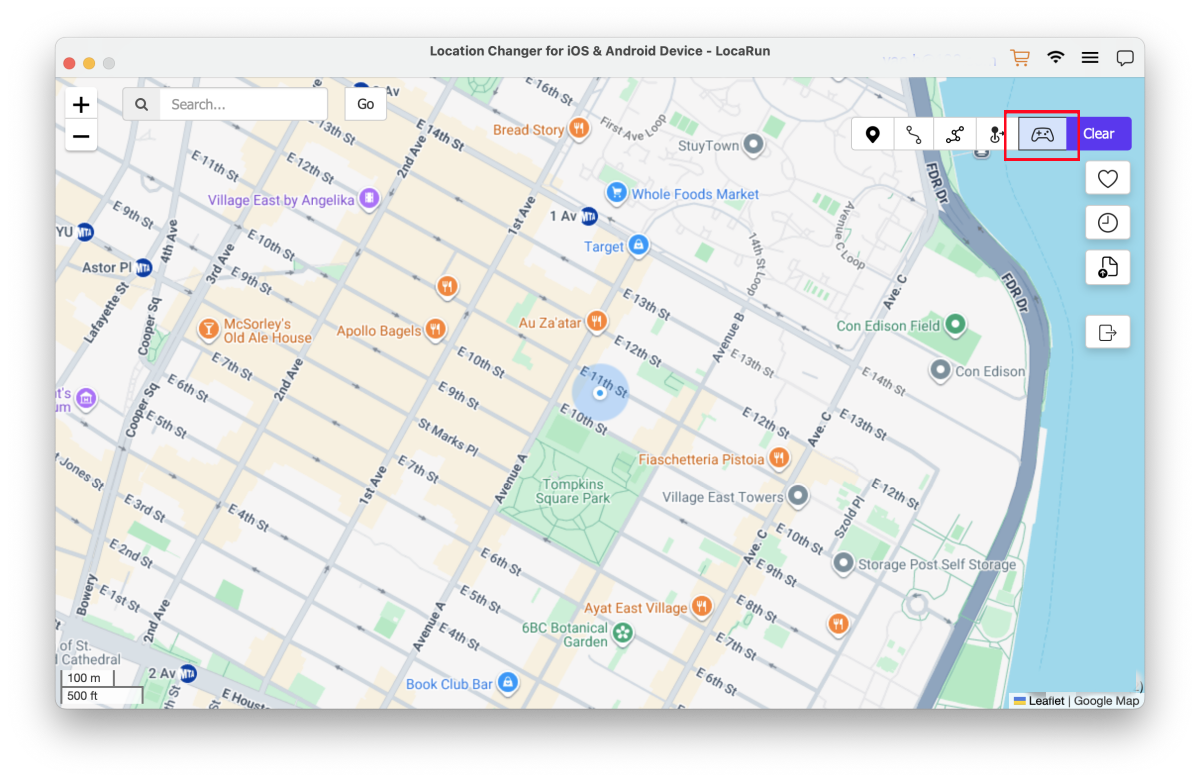
Game Controller
After connecting your game controller to the computer, you can use it to control movement. Once the map has finished loading, click the “Game Controller” button on the interface to activate this feature.
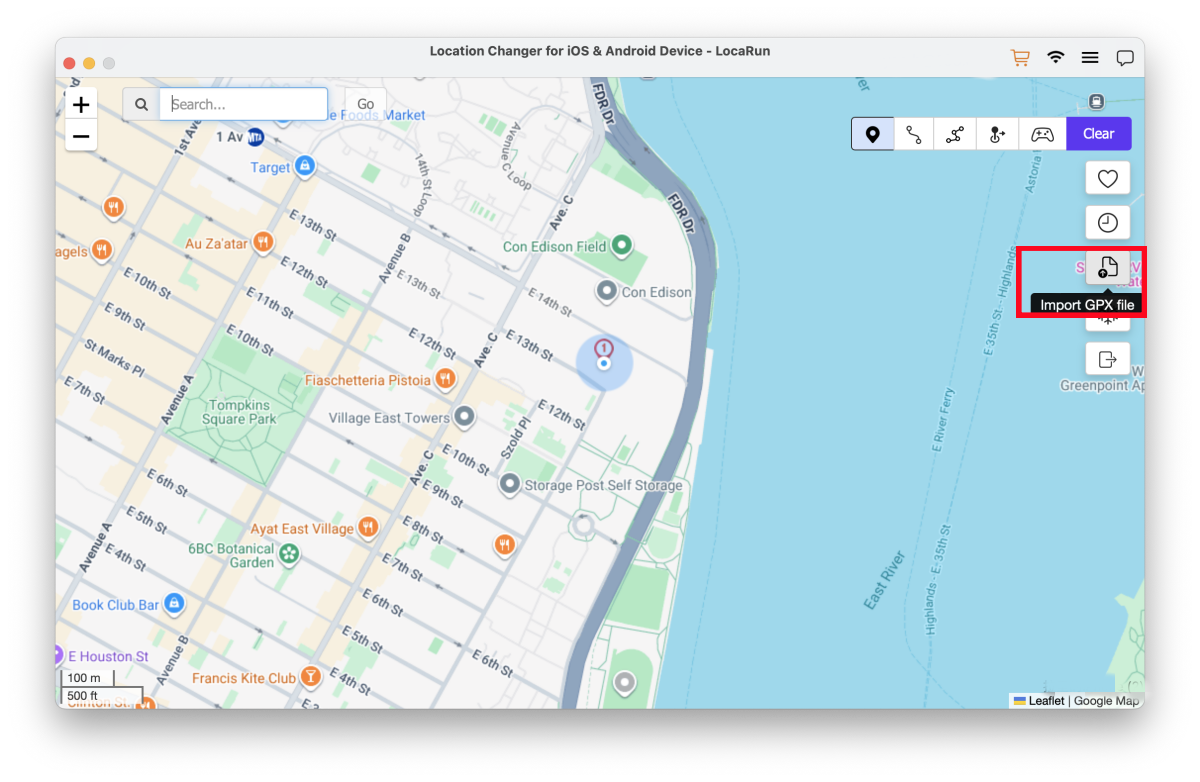
Import GPX File
LocaRun supports importing GPX format files, enabling you to instantly locate your desired precise position or simulate movement along a predefined route.
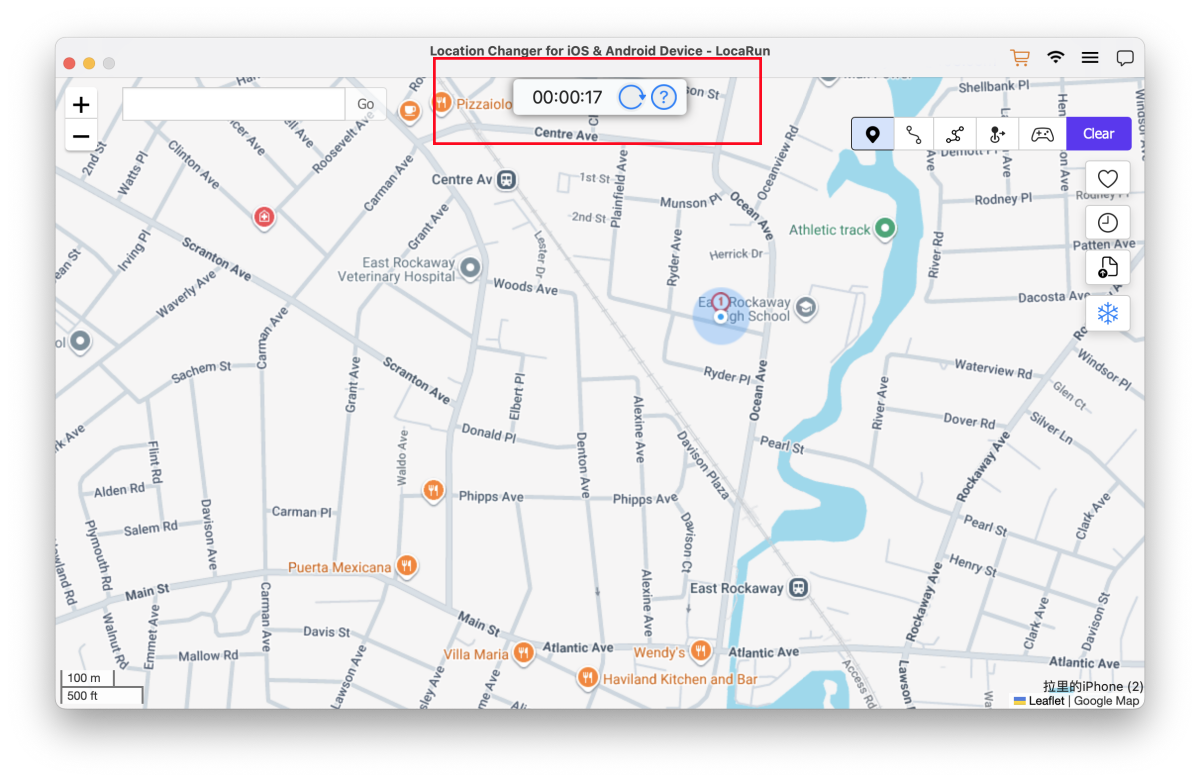
Cooldown Timer
This feature helps prevent account bans by ensuring location changes happen within a reasonable time frame.
- In Game Mode: The cooldown timer is automatically enabled for maximum security.
- In General Mode: If you wish to use this function, tap the “Cooldown Timer” button on the interface to manually activate it.
For Pokémon Go Players: Click to see the latest Pokémon GO Cooldown Chart for safer movement planning.
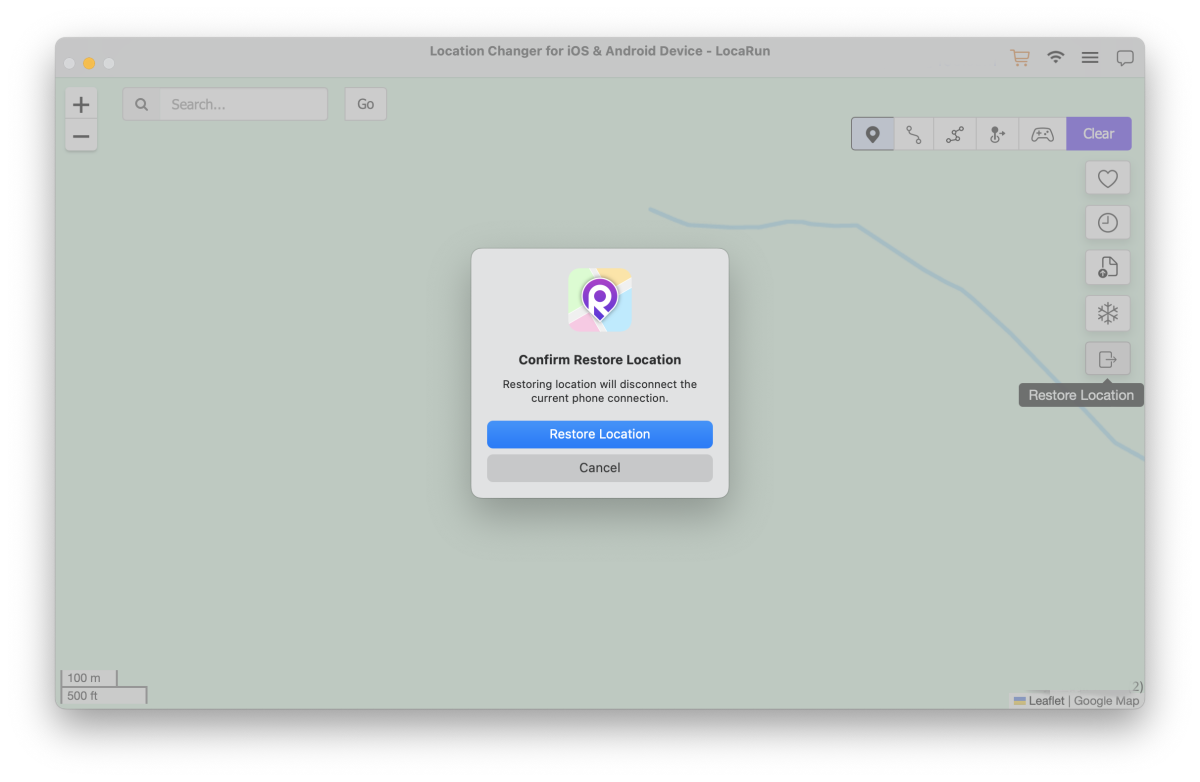
Restore Location
To revert to your real location, please click “Restore Location” on the interface.
- The program will return to the main screen, and your previously modified virtual location will no longer be active.
- If you need to modify your location again, follow the same initial steps as before.
See More User Guides Here:
- LocaRun Windows User Guide for Android Devices
- LocaRun Windows User Guide for iOS Devices
- LocaRun macOS User Guide for iOS Devices
Hi, I’m Julia, a digital privacy specialist at Locarun. I write about our GPS location changer tool and how it helps protect your online privacy. My passion lies in making cybersecurity and geolocation technology accessible to everyone. I focus on practical solutions for data protection and accessing region-specific content. Let me guide you through improving your digital privacy with straightforward, effective approaches.