Part 1. Connect
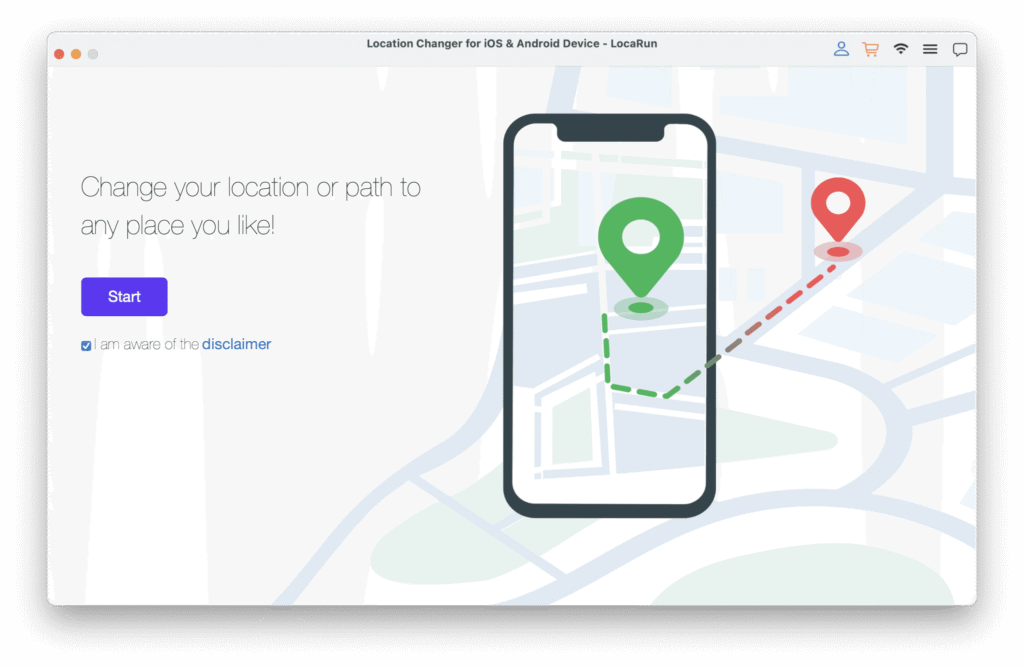
Step 1. Launch LocaRun
Download and install LocaRun on your Mac. Then choose “Start”.
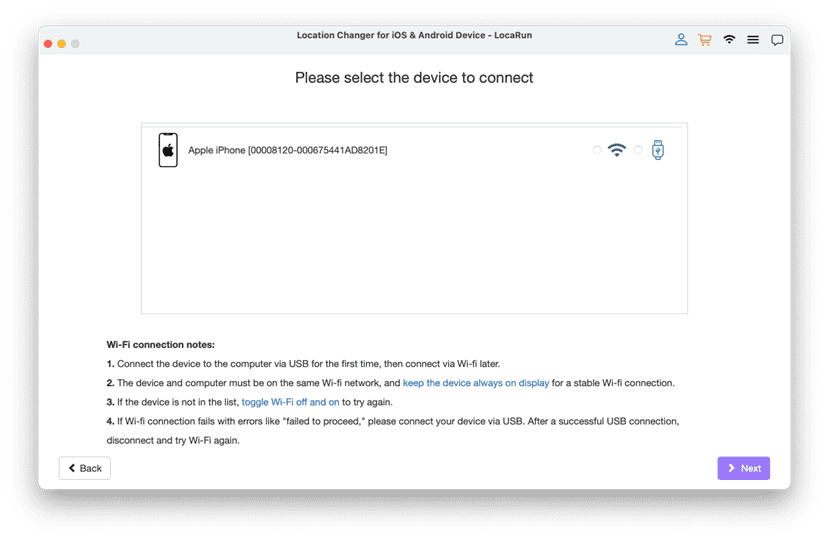
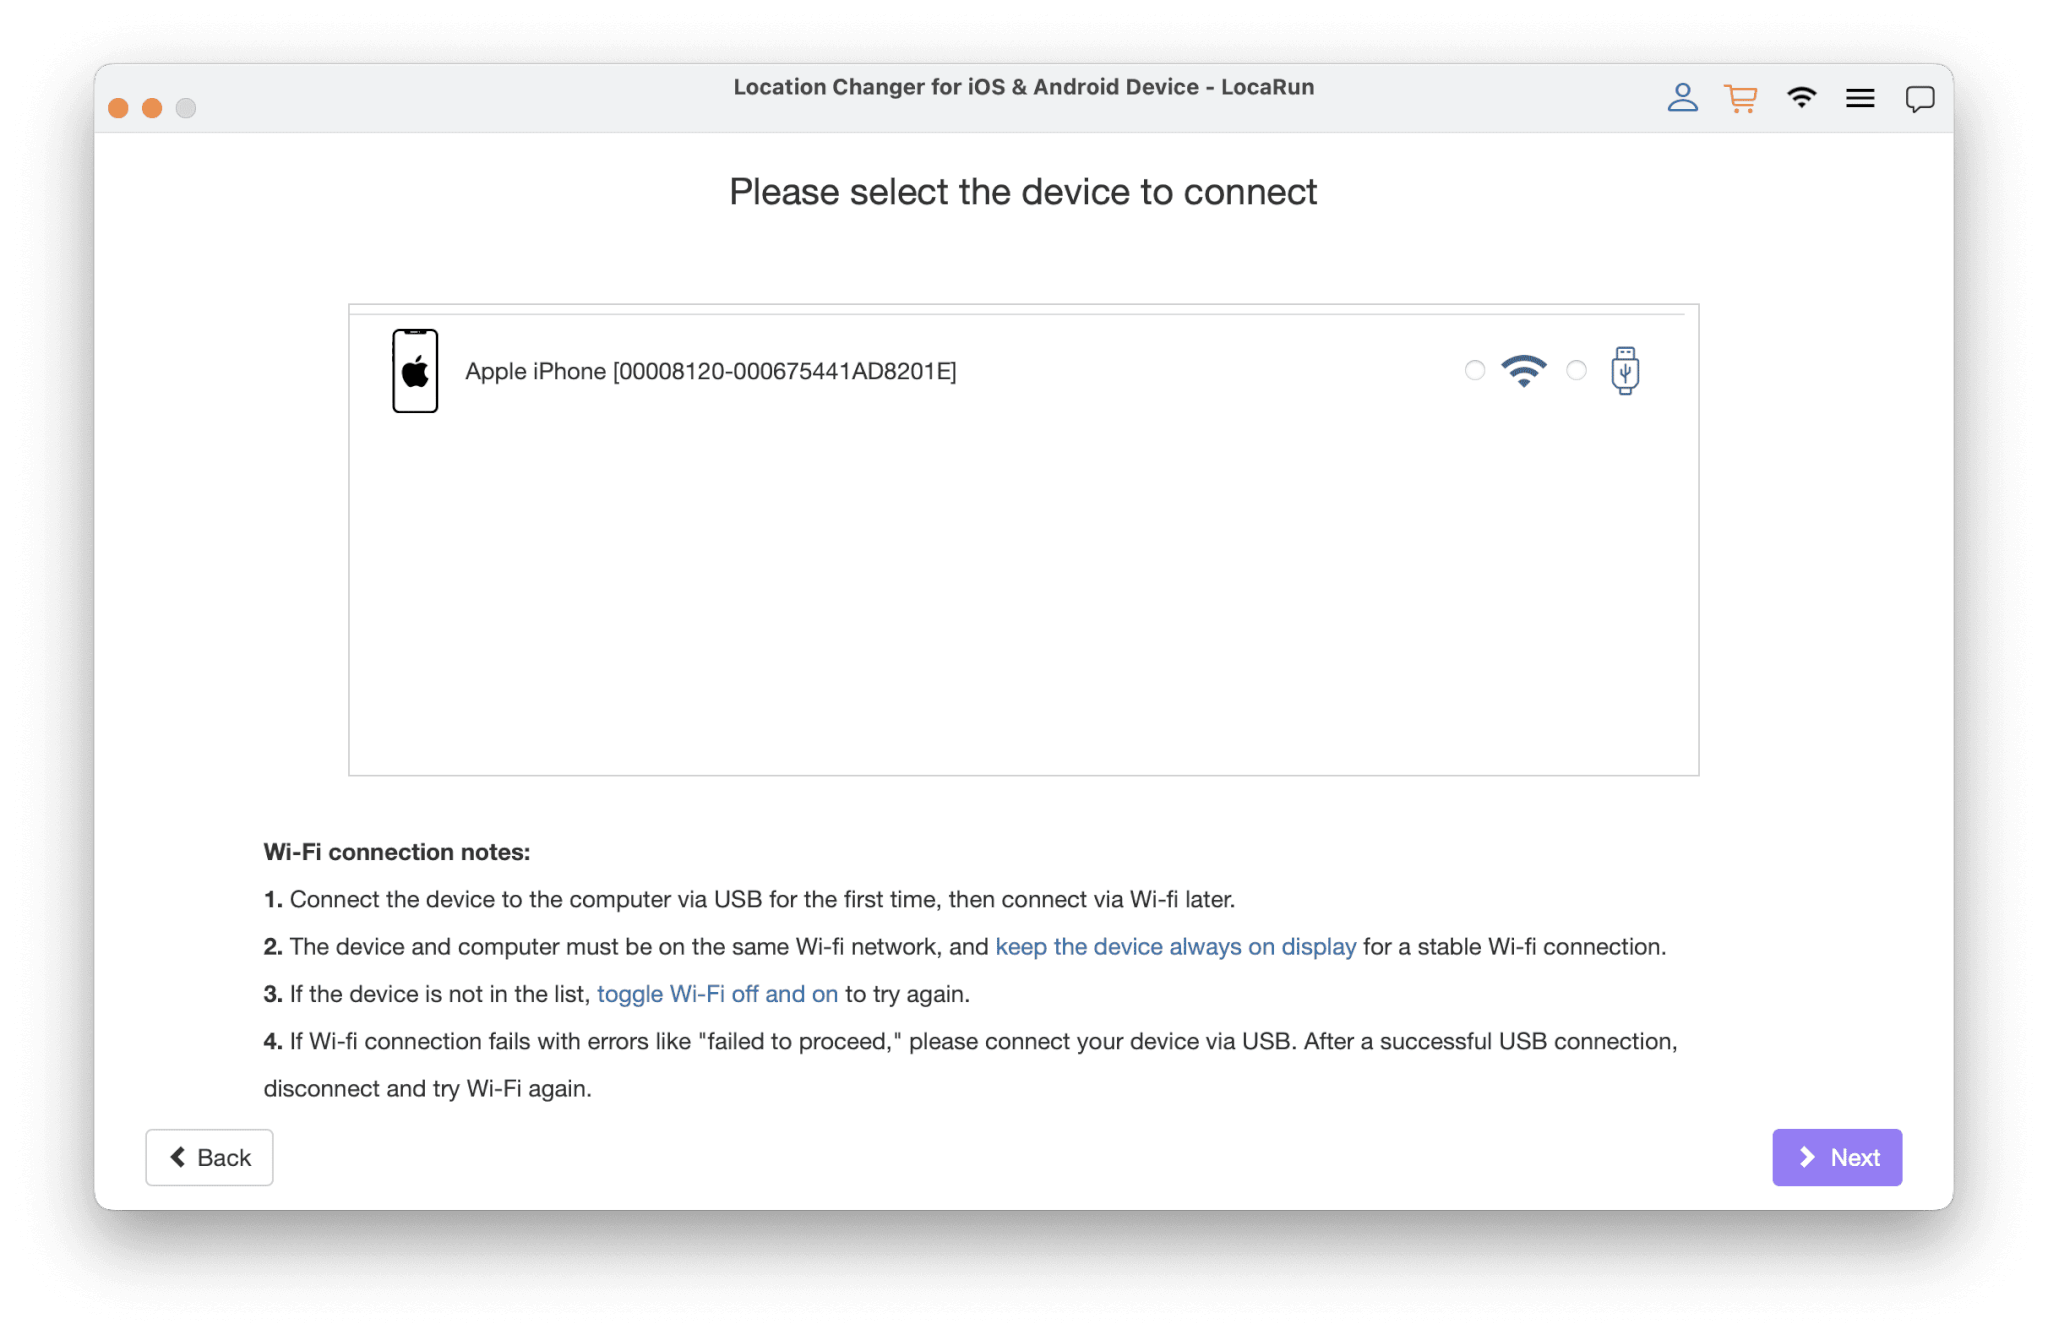
Step 2. Connect Your Device
You can choose to connect your iOS device to the computer via USB or Wi-Fi.
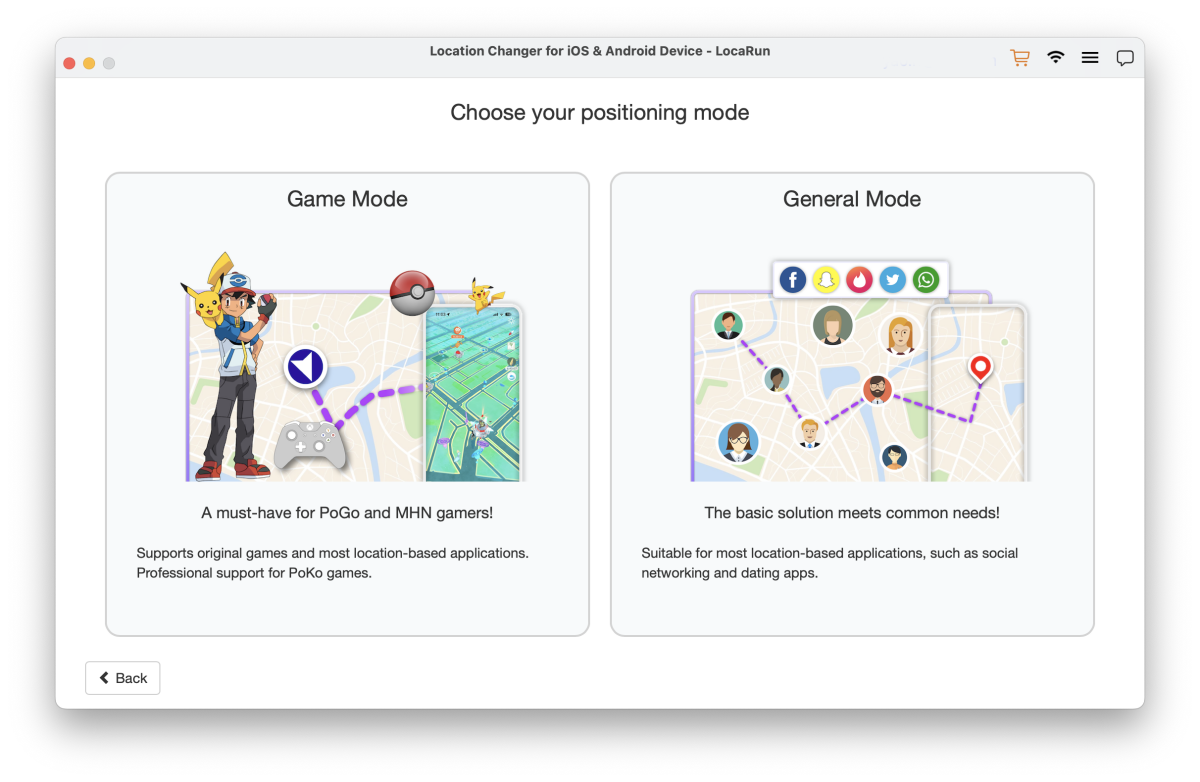
Before connection, you need to choose your positioning mode: Game Mode or General Mode.
If you want to use LocaRun to modify your location while playing games like Pokémon Go, it is recommended that you select Game Mode. In this mode, the cooldown timer will be automatically enabled, protecting your account from being banned by the platform due to rapid location changes during gameplay. If you don’t have this concern, selecting General Mode will be sufficient for your daily location modification needs.
USB Connection: Connect your iOS device to the computer via a USB cable.
Then the system will install Apple Driver, which may take a moment.
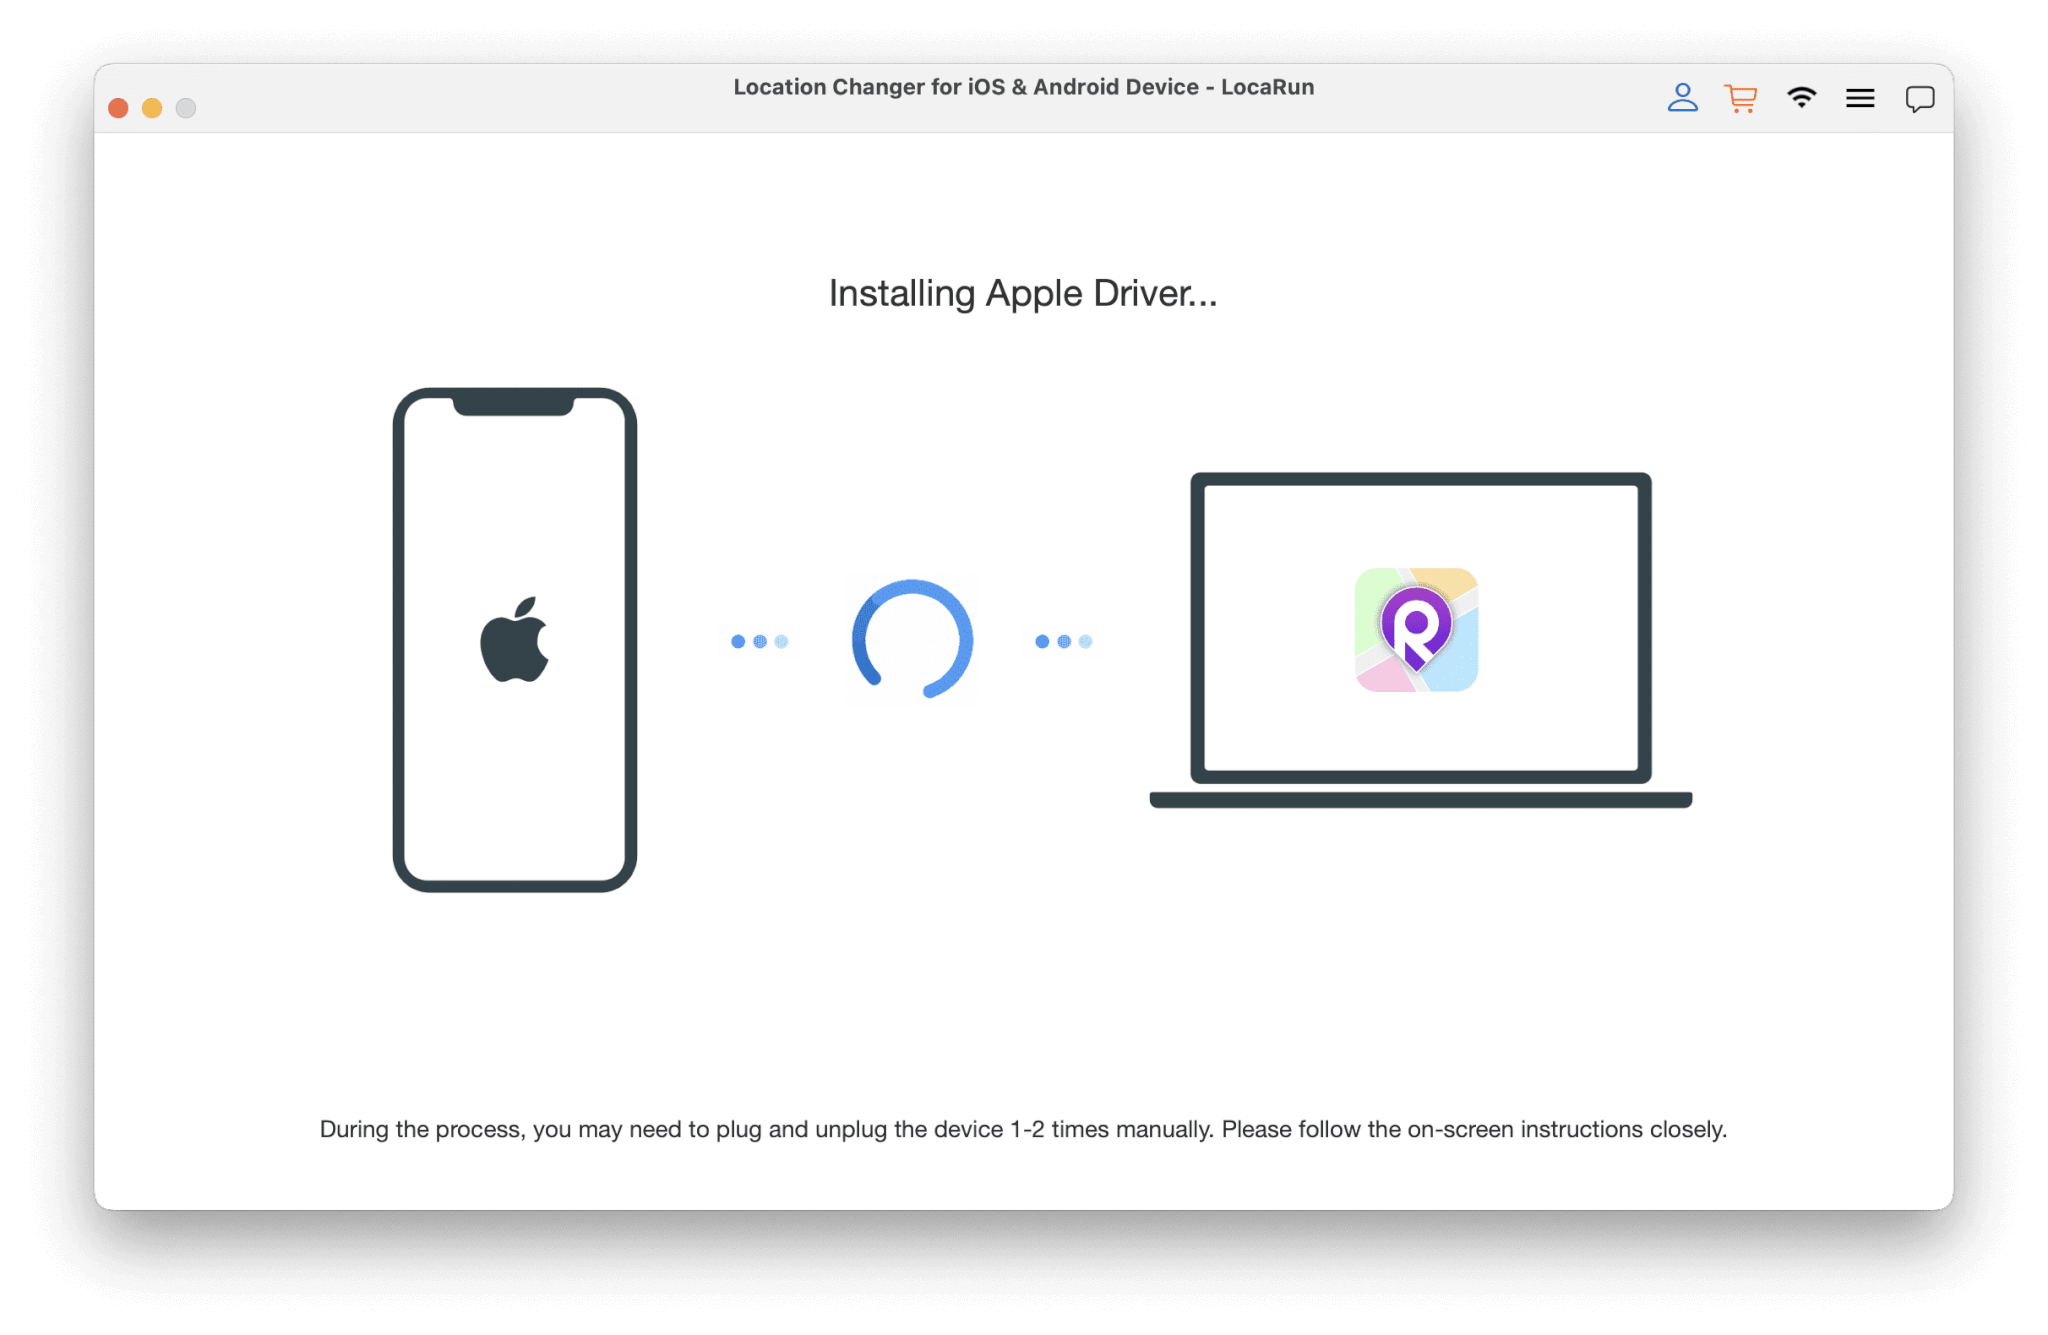
After installation completes, enter your password to authorize LocaRun to make necessary changes.
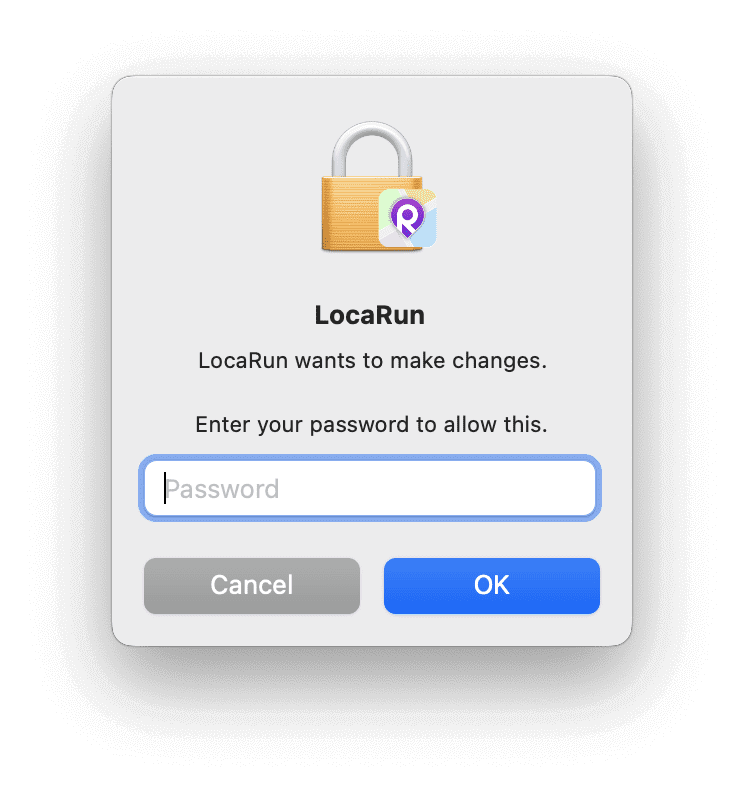
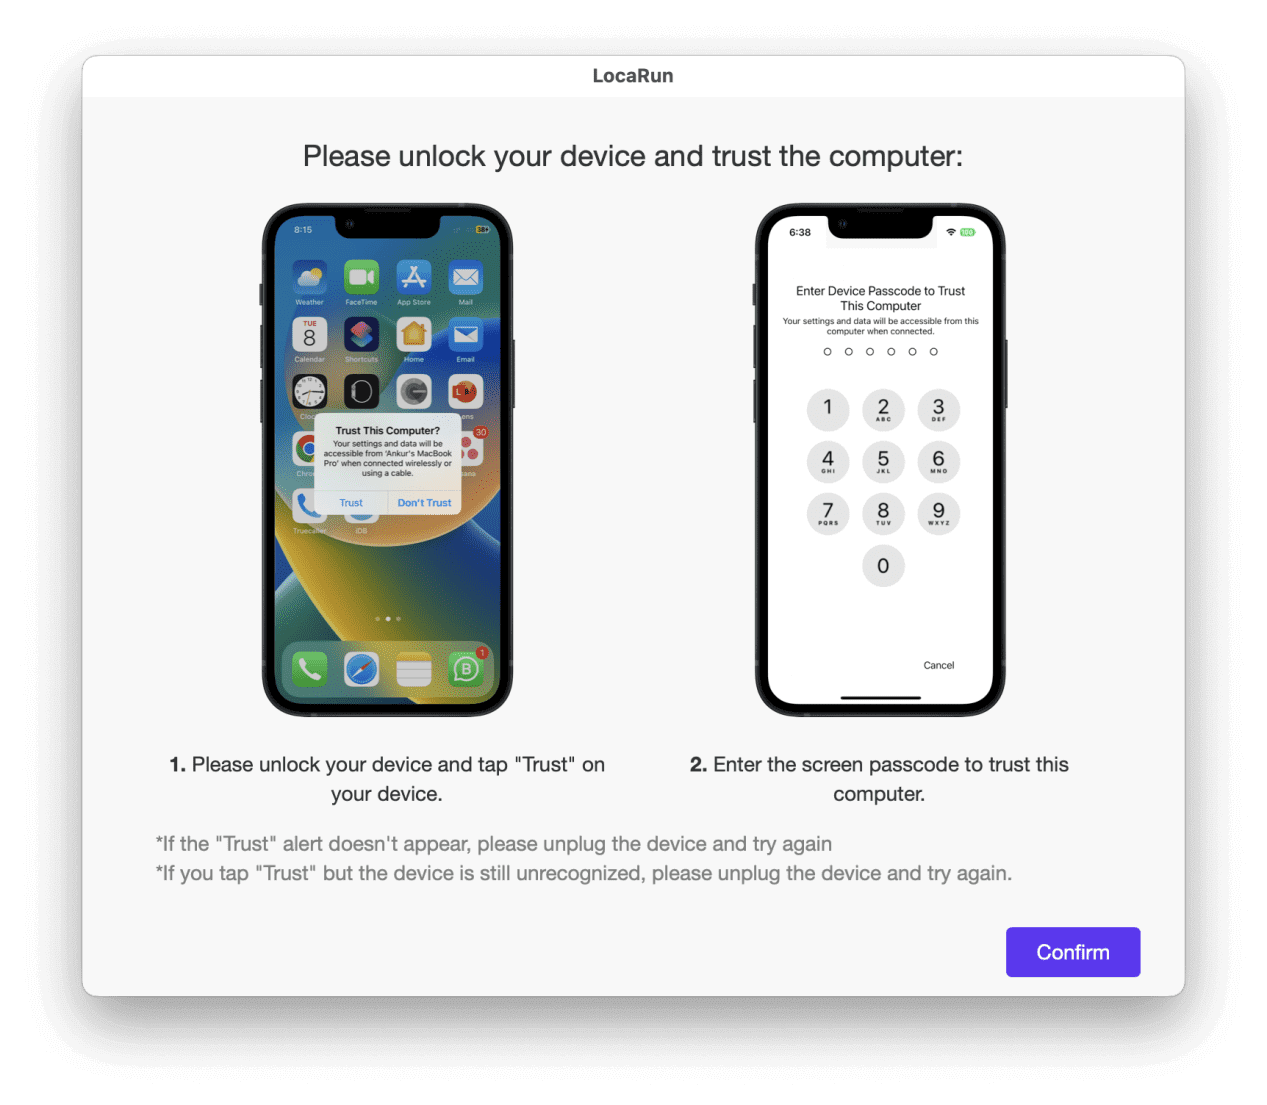
Next, unlock your device. When prompted, tap “Trust” on your iPhone to Trust This Computer. Enter your screen passcode to complete the connection process.
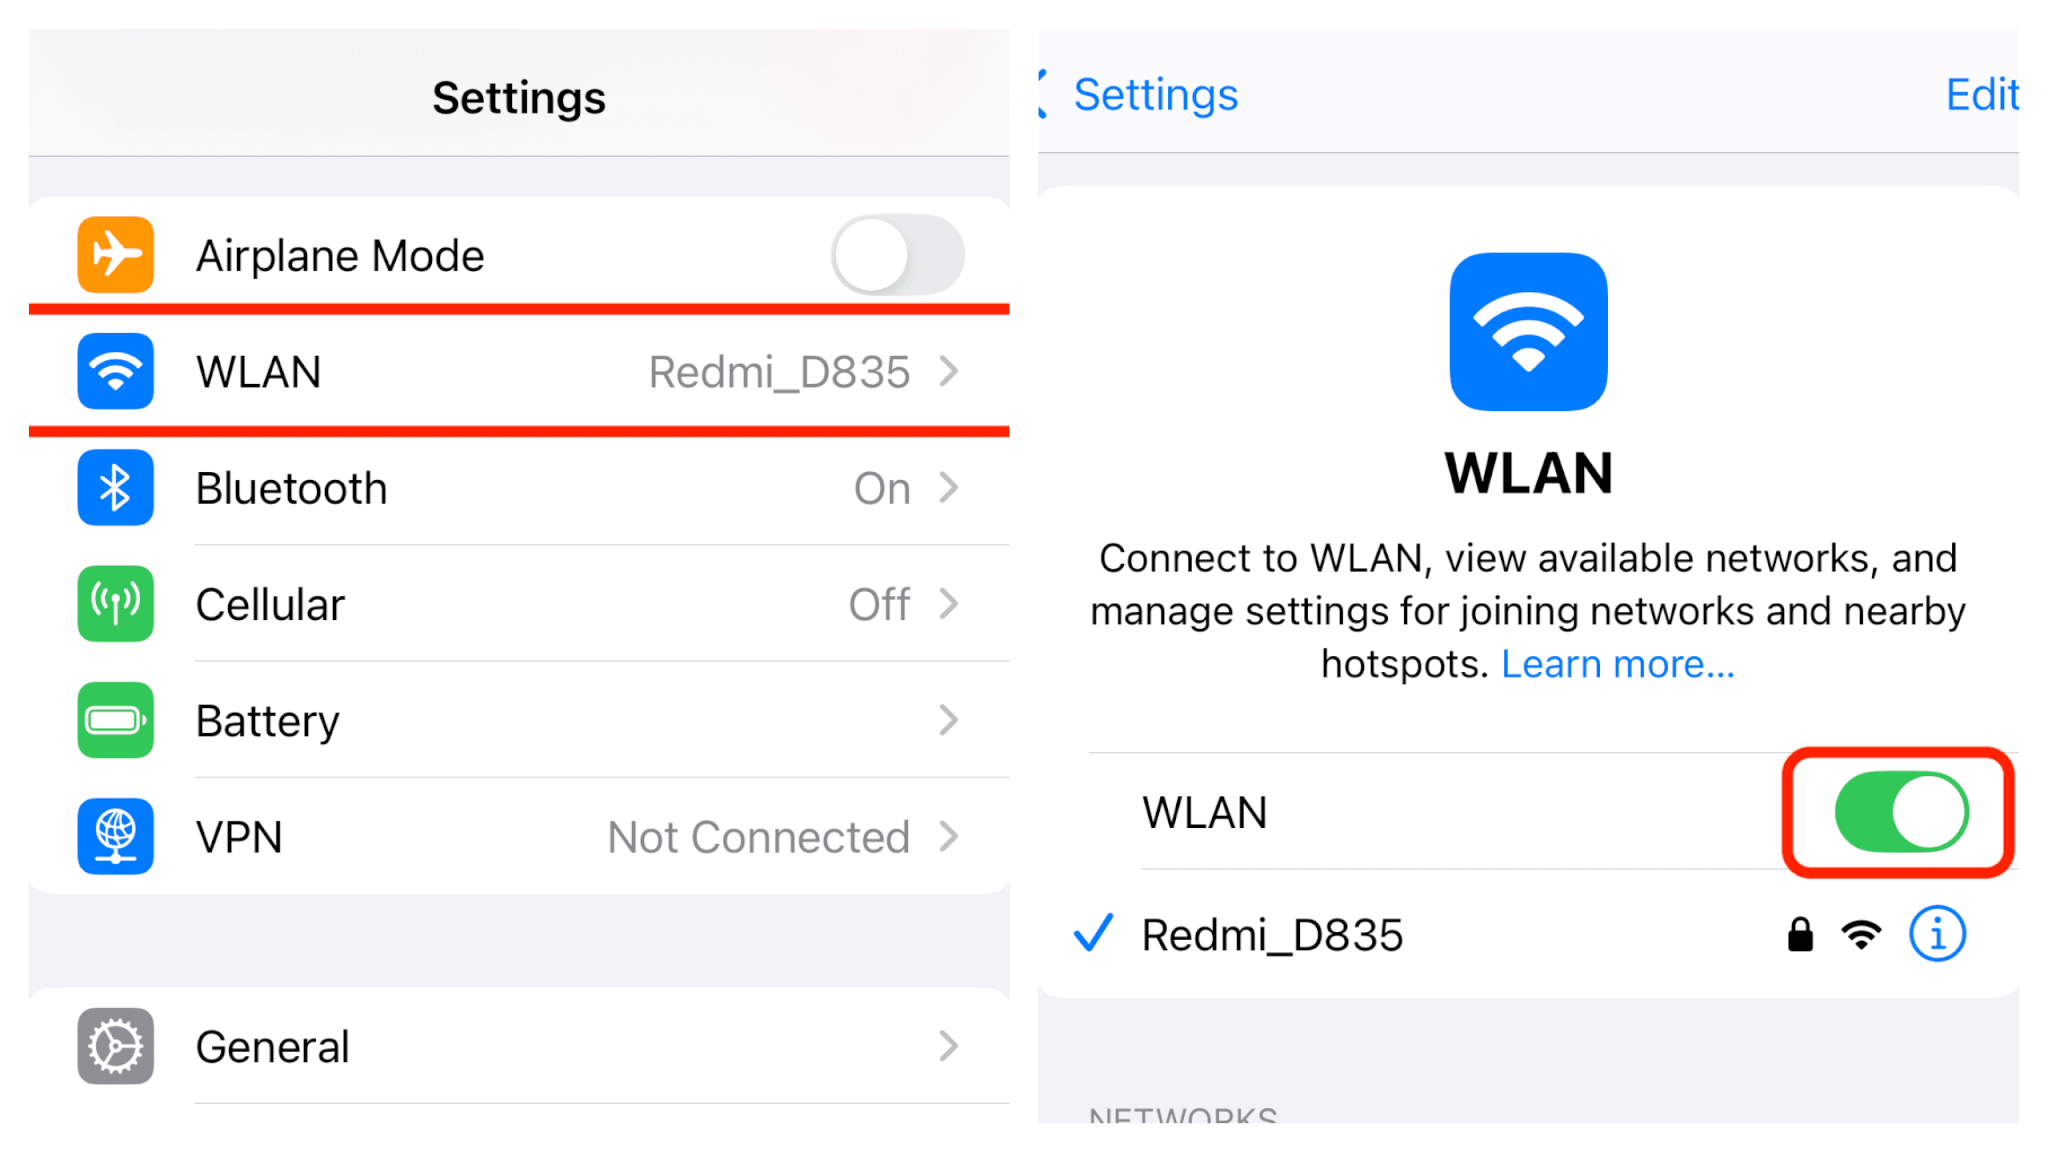
Wi-Fi connection: Please note that for first-time setup, you must connect your device via USB cable. For subsequent connections, you can directly connect your iOS device to the computer when both are on the same Wi-Fi network. If your device doesn’t appear in the list, try toggling Wi-Fi off and on again.
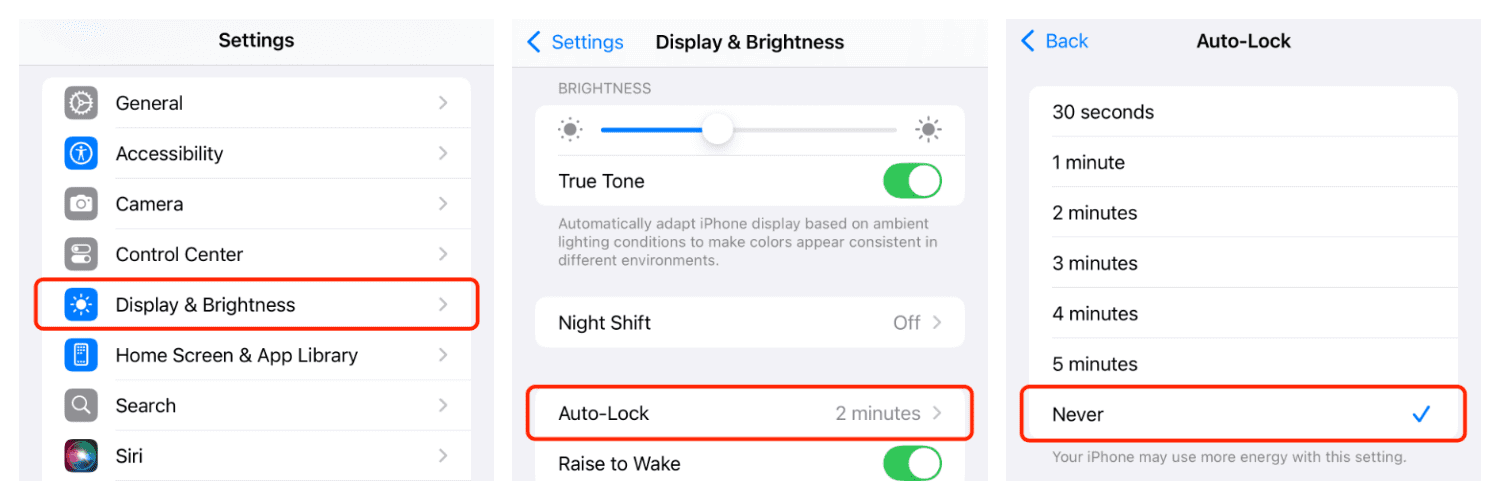
For optimal Wi-Fi connection stability, keep your device display always on by navigating to “Settings” > “Display & Brightness” > “Auto-Lock” > “Never”.
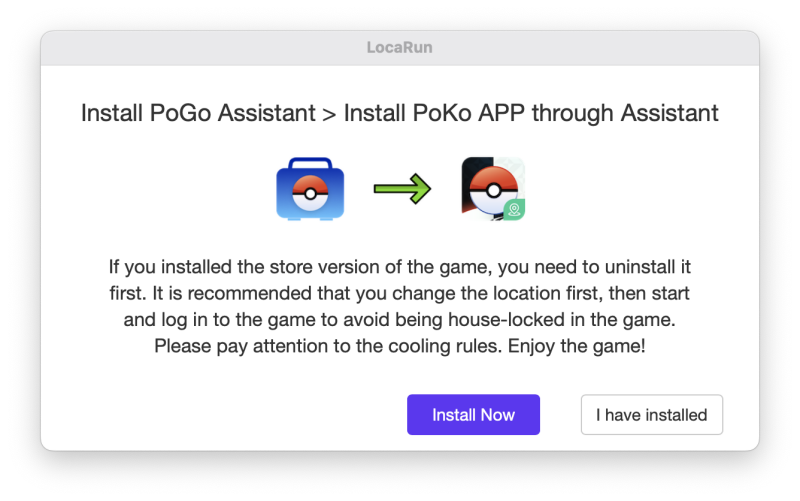
Notice: In the Game Mode, you need to install PoGo Assistant on your device according to the instructions.
Part 2. Easily Change Your GPS Location to Anywhere
How to Use Teleport Mode
Teleport mode enables you to instantly jump from your current location directly to a new destination.
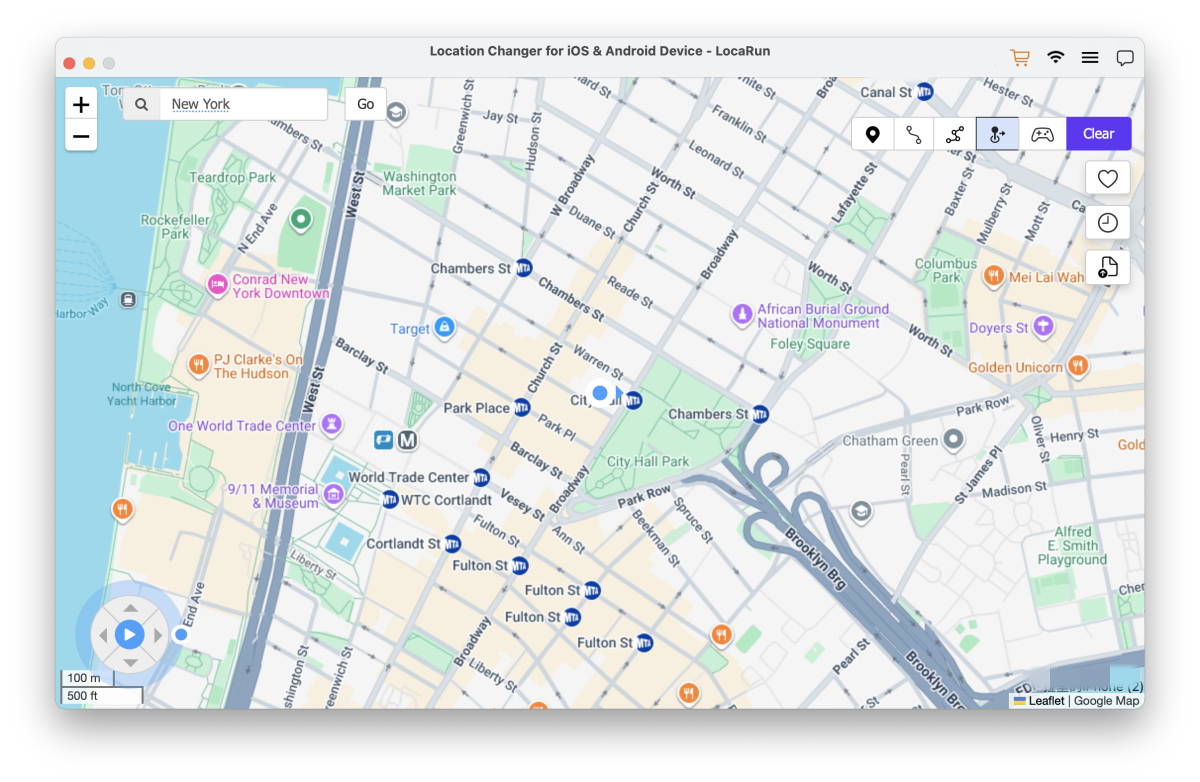
Step 1. Load the Map
Once successfully connected, the map will automatically begin loading.
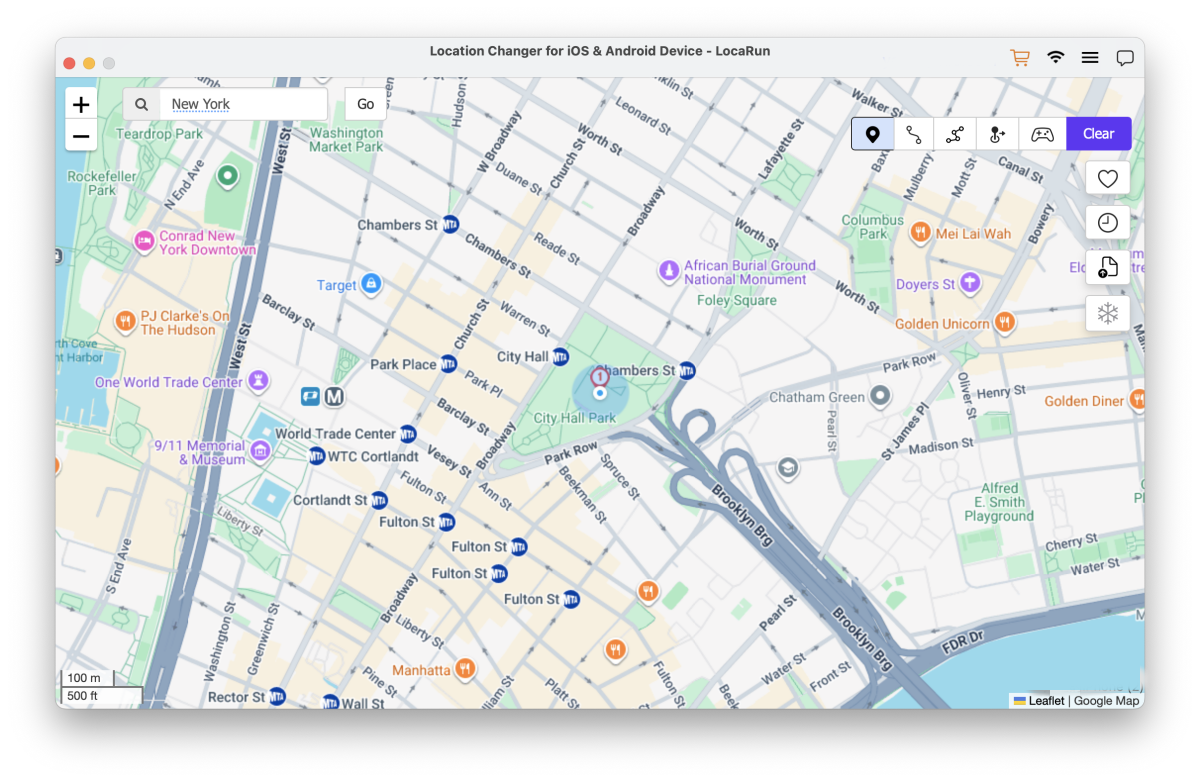
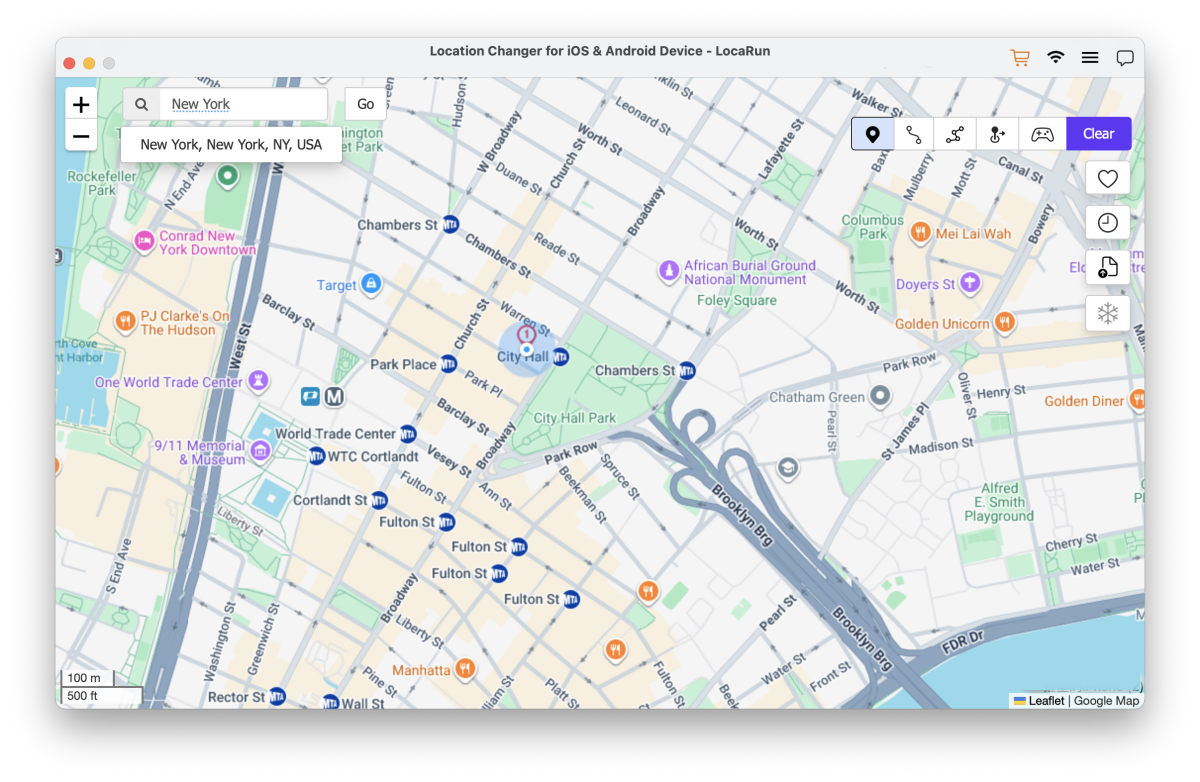
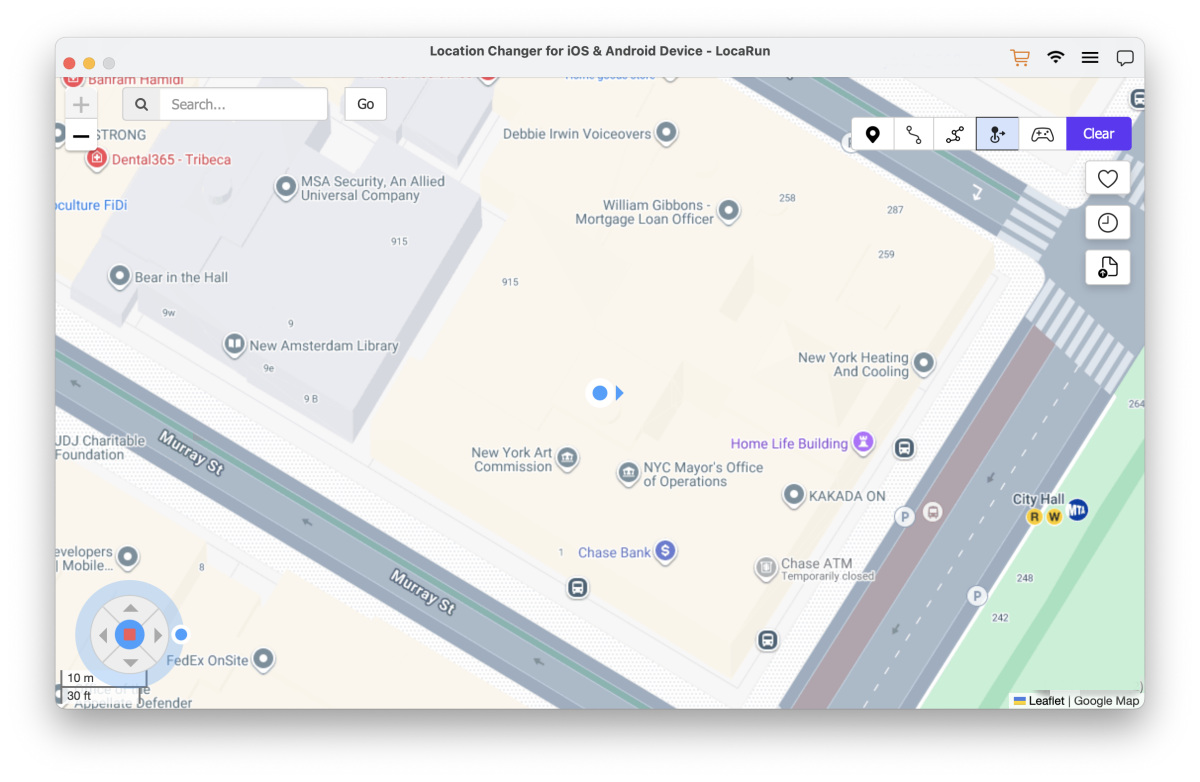
Step 2. Select a Destination on the Map
Navigate the map by scrolling your mouse to zoom in and out, then click to select your destination. Alternatively, enter a location name or specific coordinates in the search box and click “Go” to select that location.
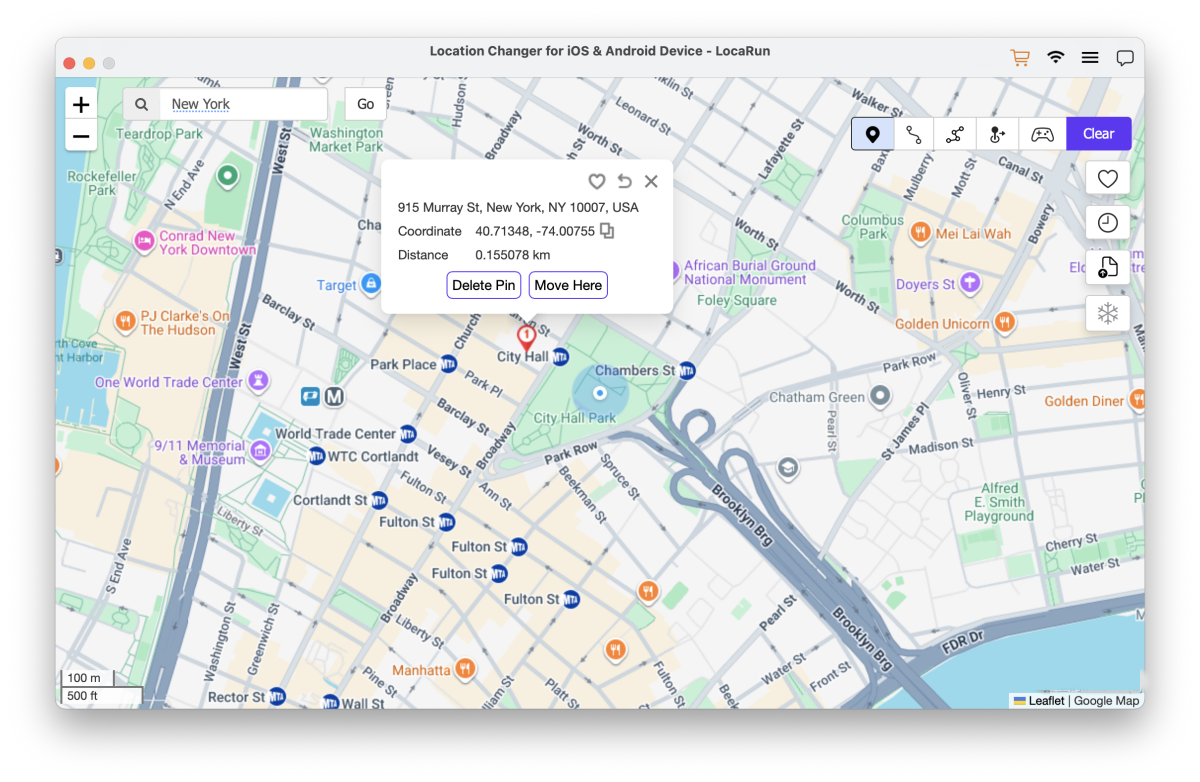
Step 3. Jump to Another Place
After selecting a destination, a pop-up window will display details including the place name, coordinates, and distance. Click “Move Here” to immediately relocate to the selected location. You can verify your new position by opening the Maps app on your device.
How to Use Two-Spot Mode
Two-spot mode simulates movement from point A to point B with customizable speed and repetition settings.
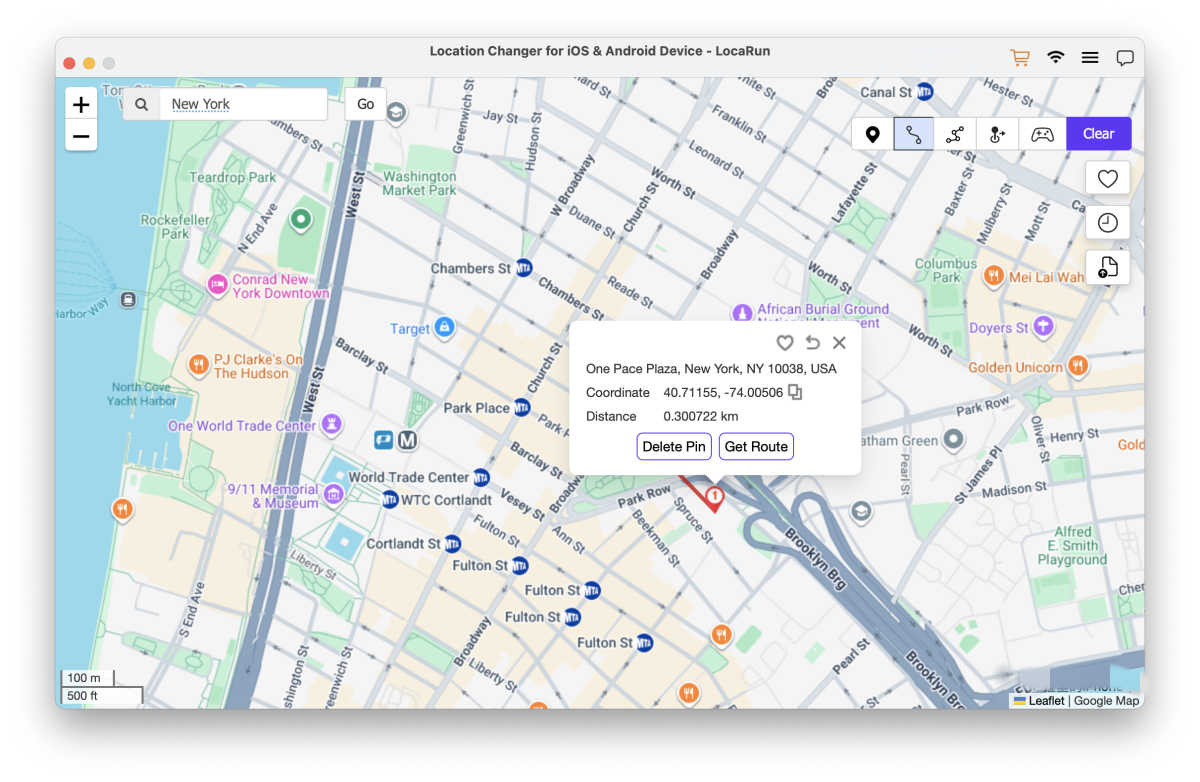
Step 1. Choose the Destination
Select both your starting location and final destination. You can precisely mark locations directly on the map, or enter specific addresses or coordinates in the Search box. Then click “Get Route” to create your path.
Step 2. Choose Moving Way
Select from three available movement methods (Walking Way, Driving Way, or Straight Way) based on your needs.
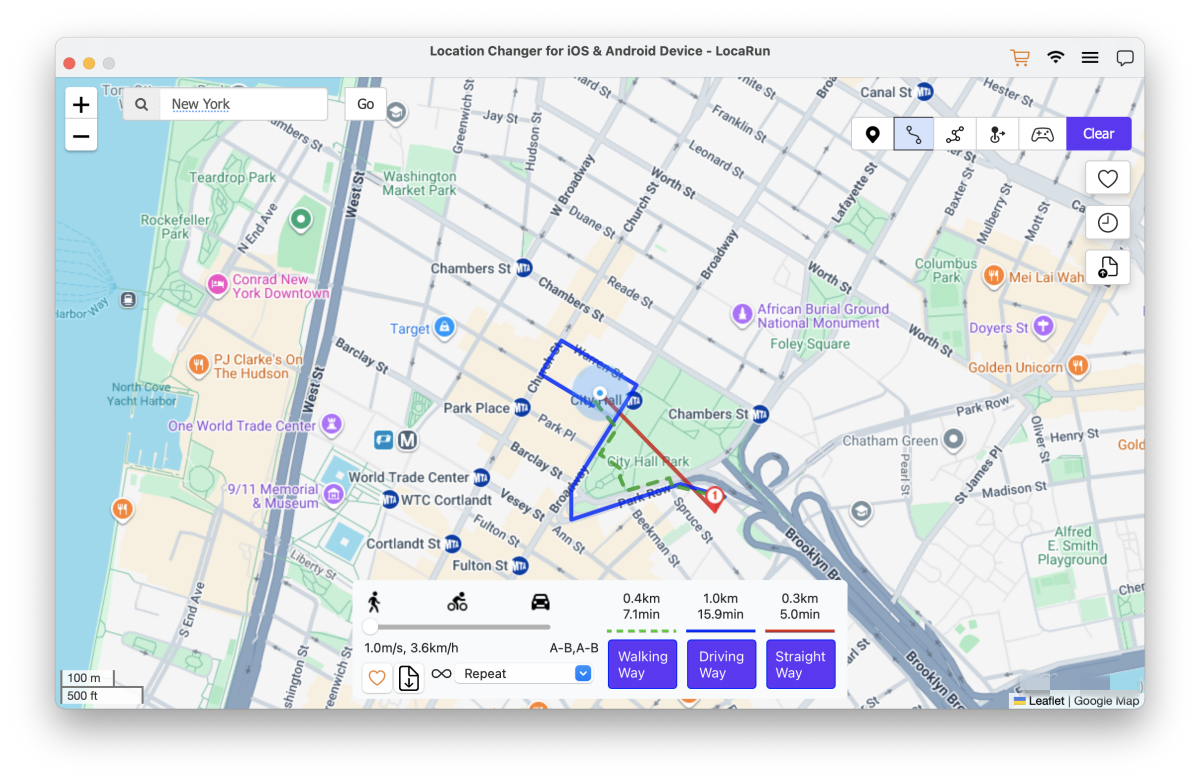
Step 3. Set Moving Speed
Customize your movement speed (with options up to 120km/h) and set how many times you want to repeat the route. Finally, click “March” to begin your simulated journey.

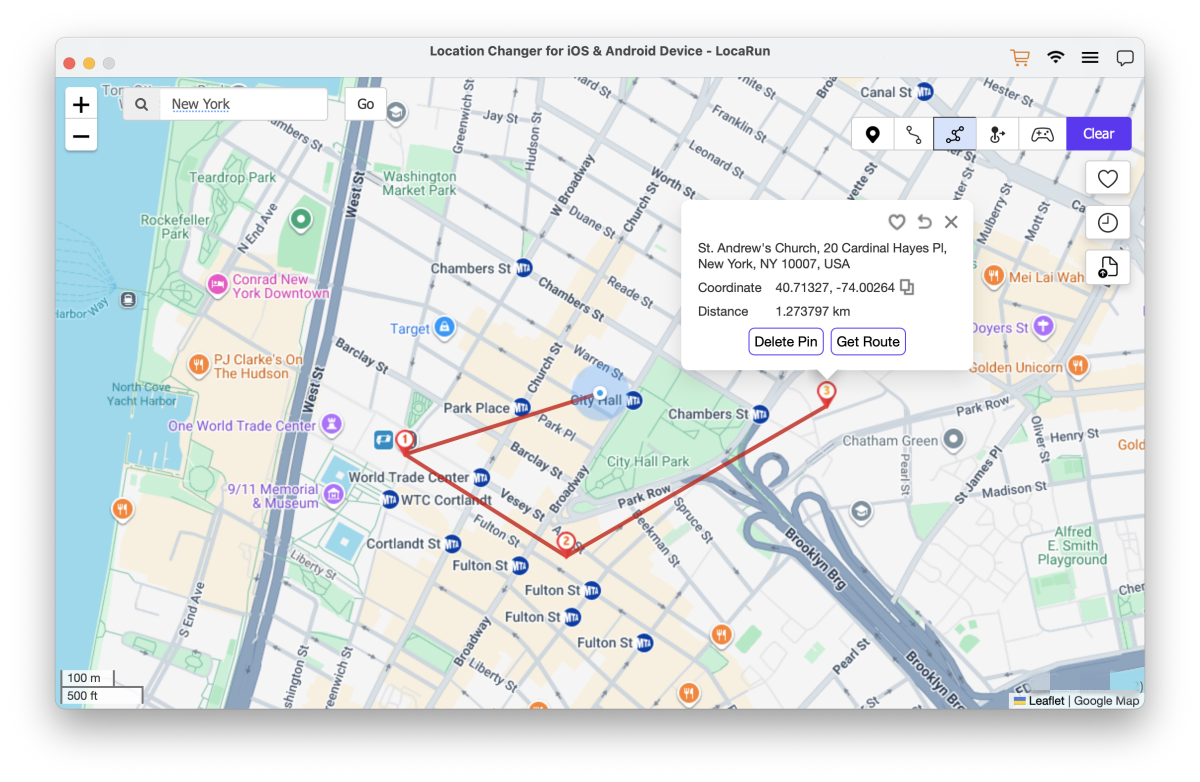
How to Use Multi-Spot Mode
Multi-spot mode is ideal for gamers who need to collect items from multiple locations.
Step 1. Select Locations
Mark multiple locations on the map in the sequence you wish to visit them, then click “Get Route” to create your path. If you need to remove any selected location, simply select it and click “Delete Pin”.
Step 2. Choose Moving Way and Set Loop Mode
Select from three available movement methods (Walking Way, Driving Way, or Straight Way) based on your needs. Choose your preferred loop mode: either “Repeat” to return to the beginning after reaching the end, or “Loop Around” to continue in a circular pattern.
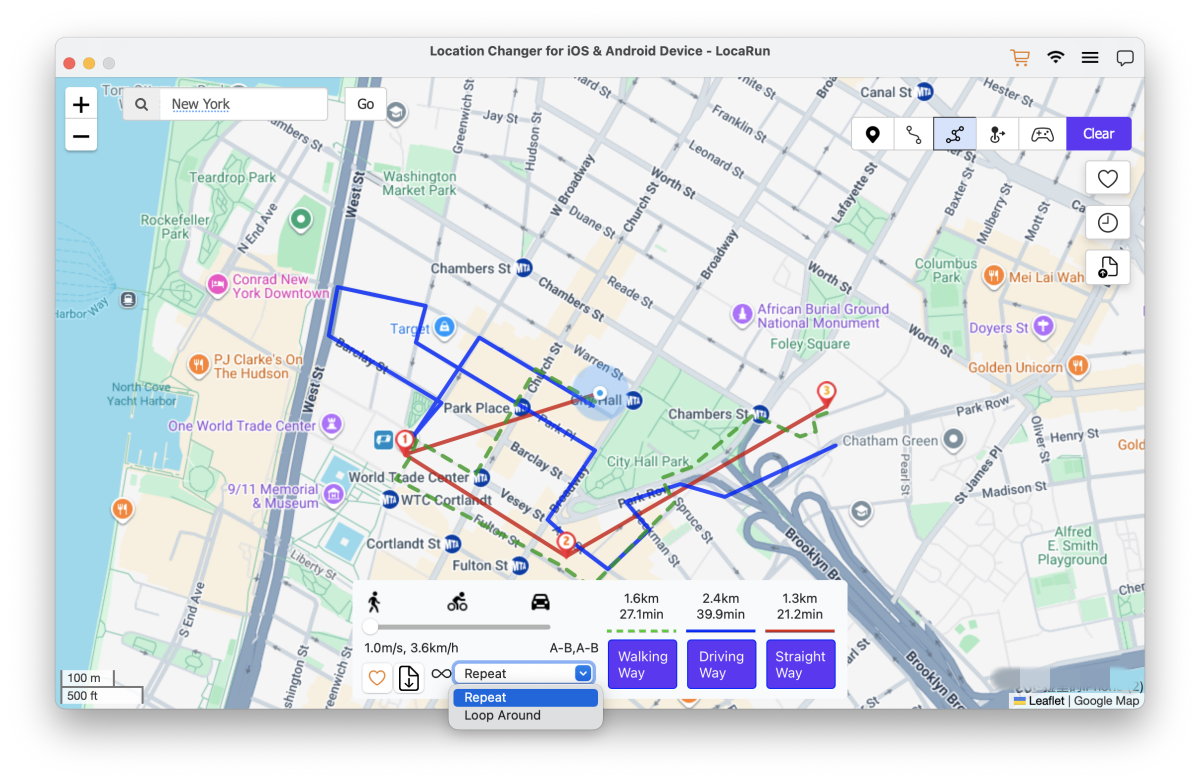
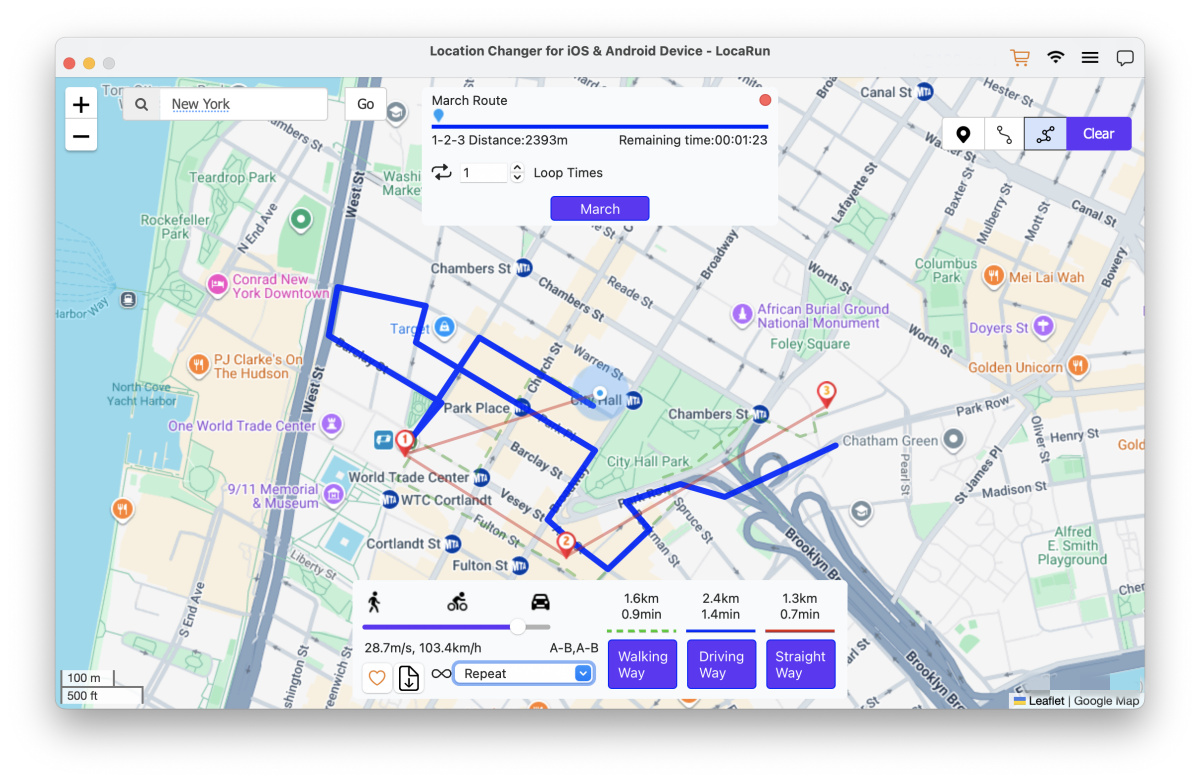
Step 3. Customize the Moving Speed
Then set your movement speed anywhere from 3.6km/h to 120km/h. Finally, click “March” to begin your journey through multiple locations.
How to Use Joystick Mode
Joystick mode gives you real-time control over your character’s movement using your keyboard.
Step 1. Enter Joystick Mode
Click the Joystick Mode icon located in the upper right corner of the interface. Locate the joystick control panel at the bottom left of your screen, then click the “Start” button to activate it.
Step 2. Set the Direction
Control movement in any direction with 360-degree freedom. Click the Direction buttons to move forward or reverse. You can adjust your direction in real-time as you move. Control your movement speed by using the Up and Down buttons to increase or decrease your pace. Or you can use keys Up, Down, Left, Right to control GPS spot movement.
More Features
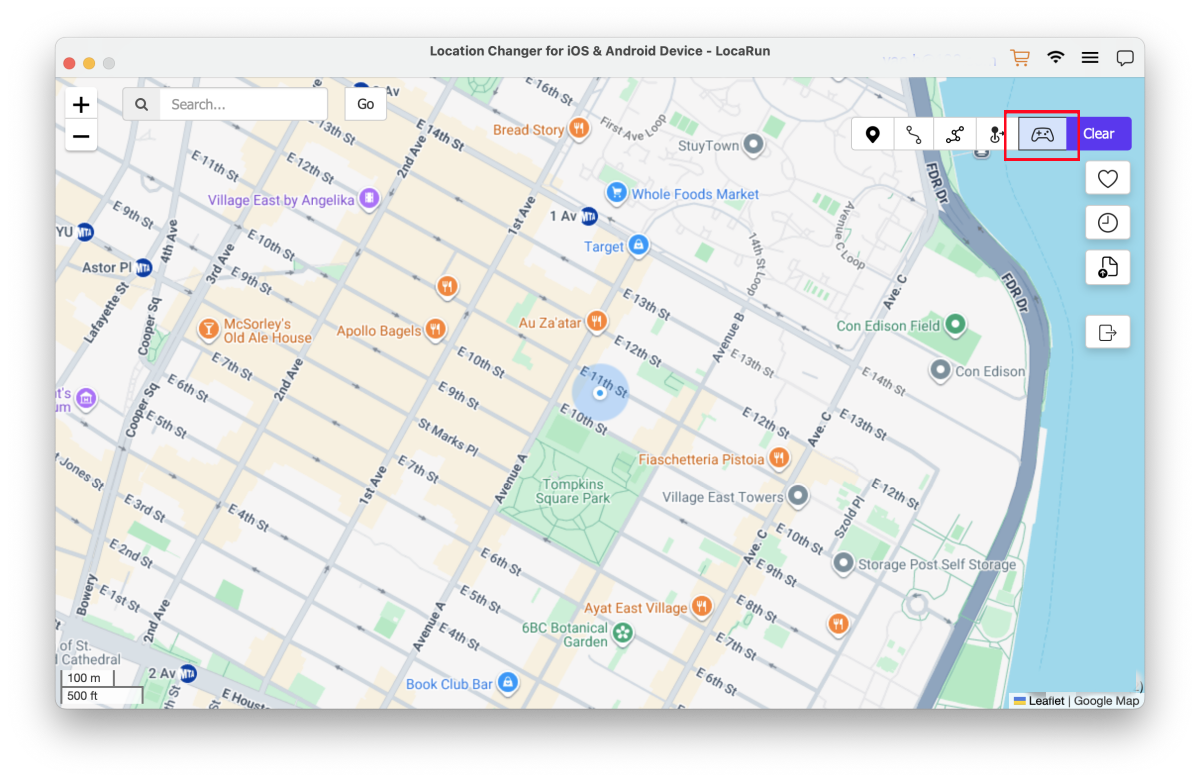
Game Controller
After connecting your game controller to the computer, you can use the game controller to control movement. Once the map has finished loading, click the “Game Controller” button.
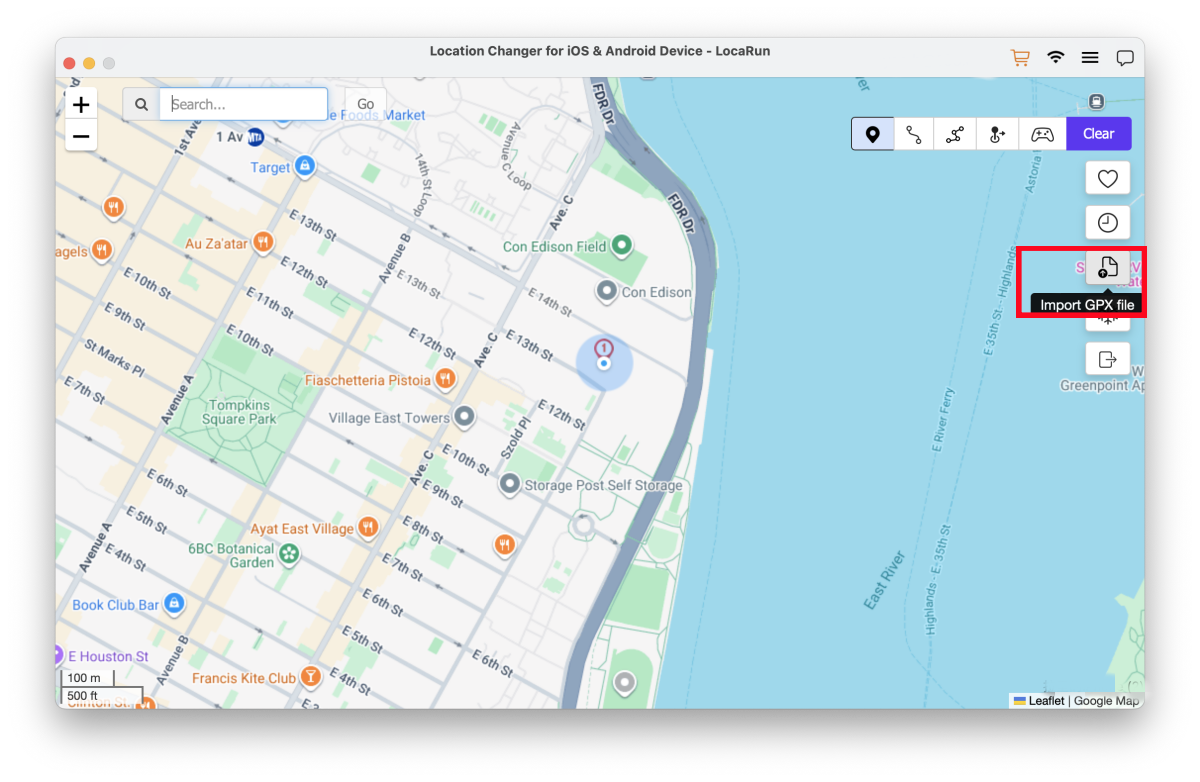
Import GPX File
LocaRun supports importing GPX format files, allowing you to instantly locate your desired precise position.
Cooldown Timer
In Game Mode, the cooldown timer will be automatically enabled. This ensures your location changes remain within a reasonable time frame, preventing your account from being banned by the platform for changing locations too quickly.
In General Mode, if you want to use the cooldown timer function, you just need to tap the cooldown timer on the interface to activate it.
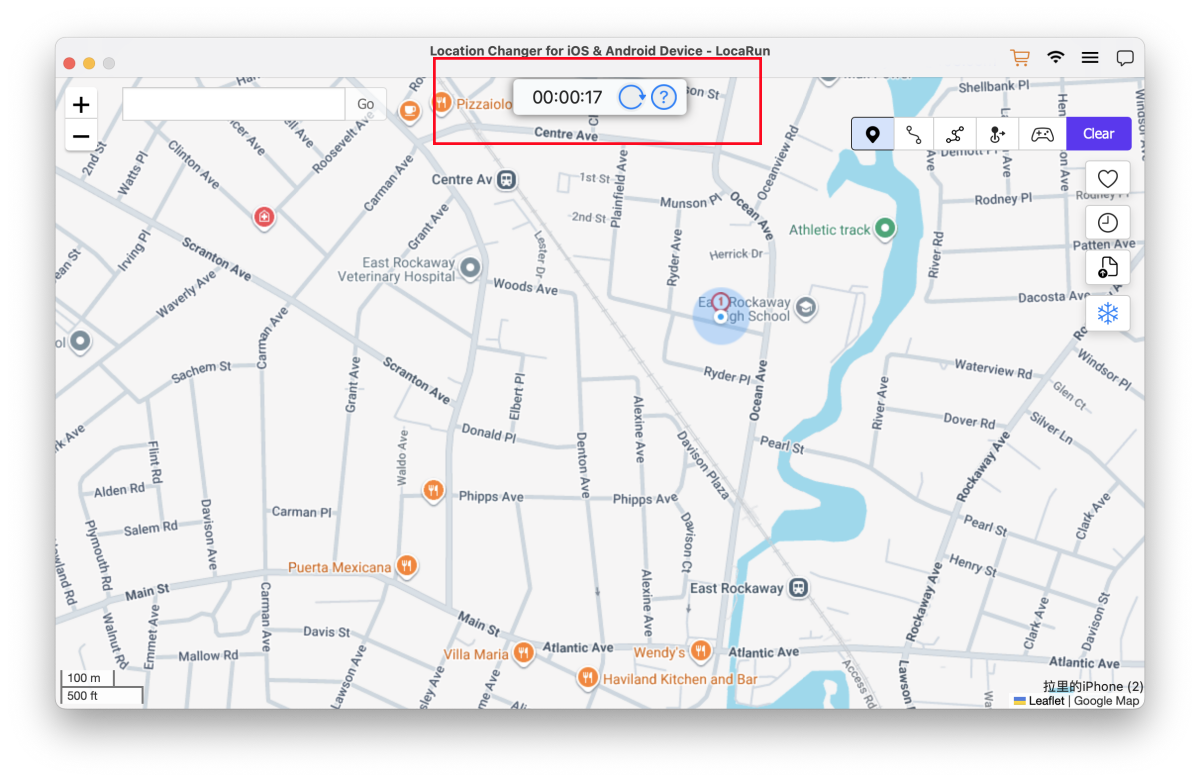
If you are a Pokémon Go player, you can click to see the latest Pokémon GO Cooldown Chart.
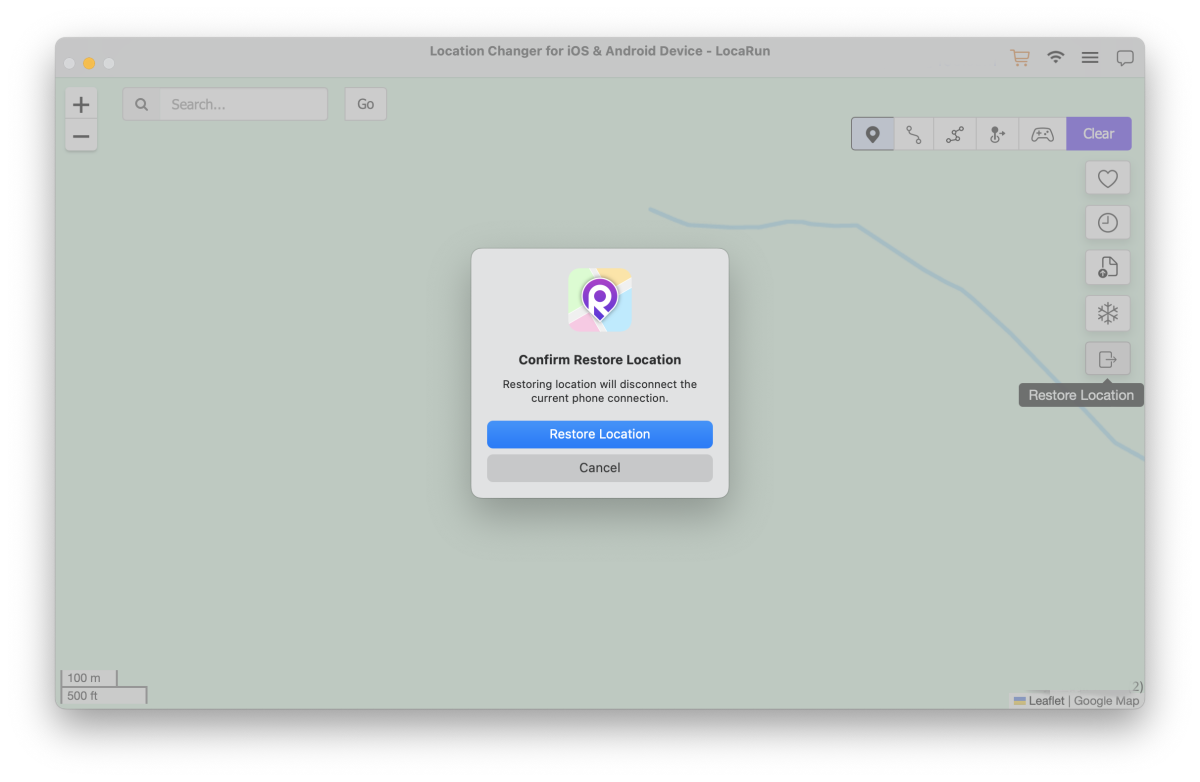
Restore Location
If you want to restore your real location, please click “Restore Location” on the interface. The program will return to the main screen, and your previously modified location will no longer be active. If you need to modify your location again, just follow the same steps as before.
See More User Guides Here:
- LocaRun Windows User Guide for Android Devices
- LocaRun Windows User Guide for iOS Devices
- LocaRun macOS User Guide for Android Devices
Hi, I’m Danny, a cybersecurity expert with 15+ years in digital privacy. I lead Locarun’s technical content on geolocation security solutions. My industry background helps me translate complex privacy technologies into practical strategies for protecting your online identity. I’m dedicated to empowering users with effective tools to control their digital footprint through our GPS location changer.